Last updated on June 25, 2018
Howdy, folks. I’m back to talk some more about my backyard aquaponics build. This is the second post in the series. In the first article, I described the tanks and general water flow of the system, as well as a quick touch on the “grow-pipes” that I’m using. In this article, I’m going to talk in greater detail about the grow-pipes, as well as what I anticipate might be issues with them.
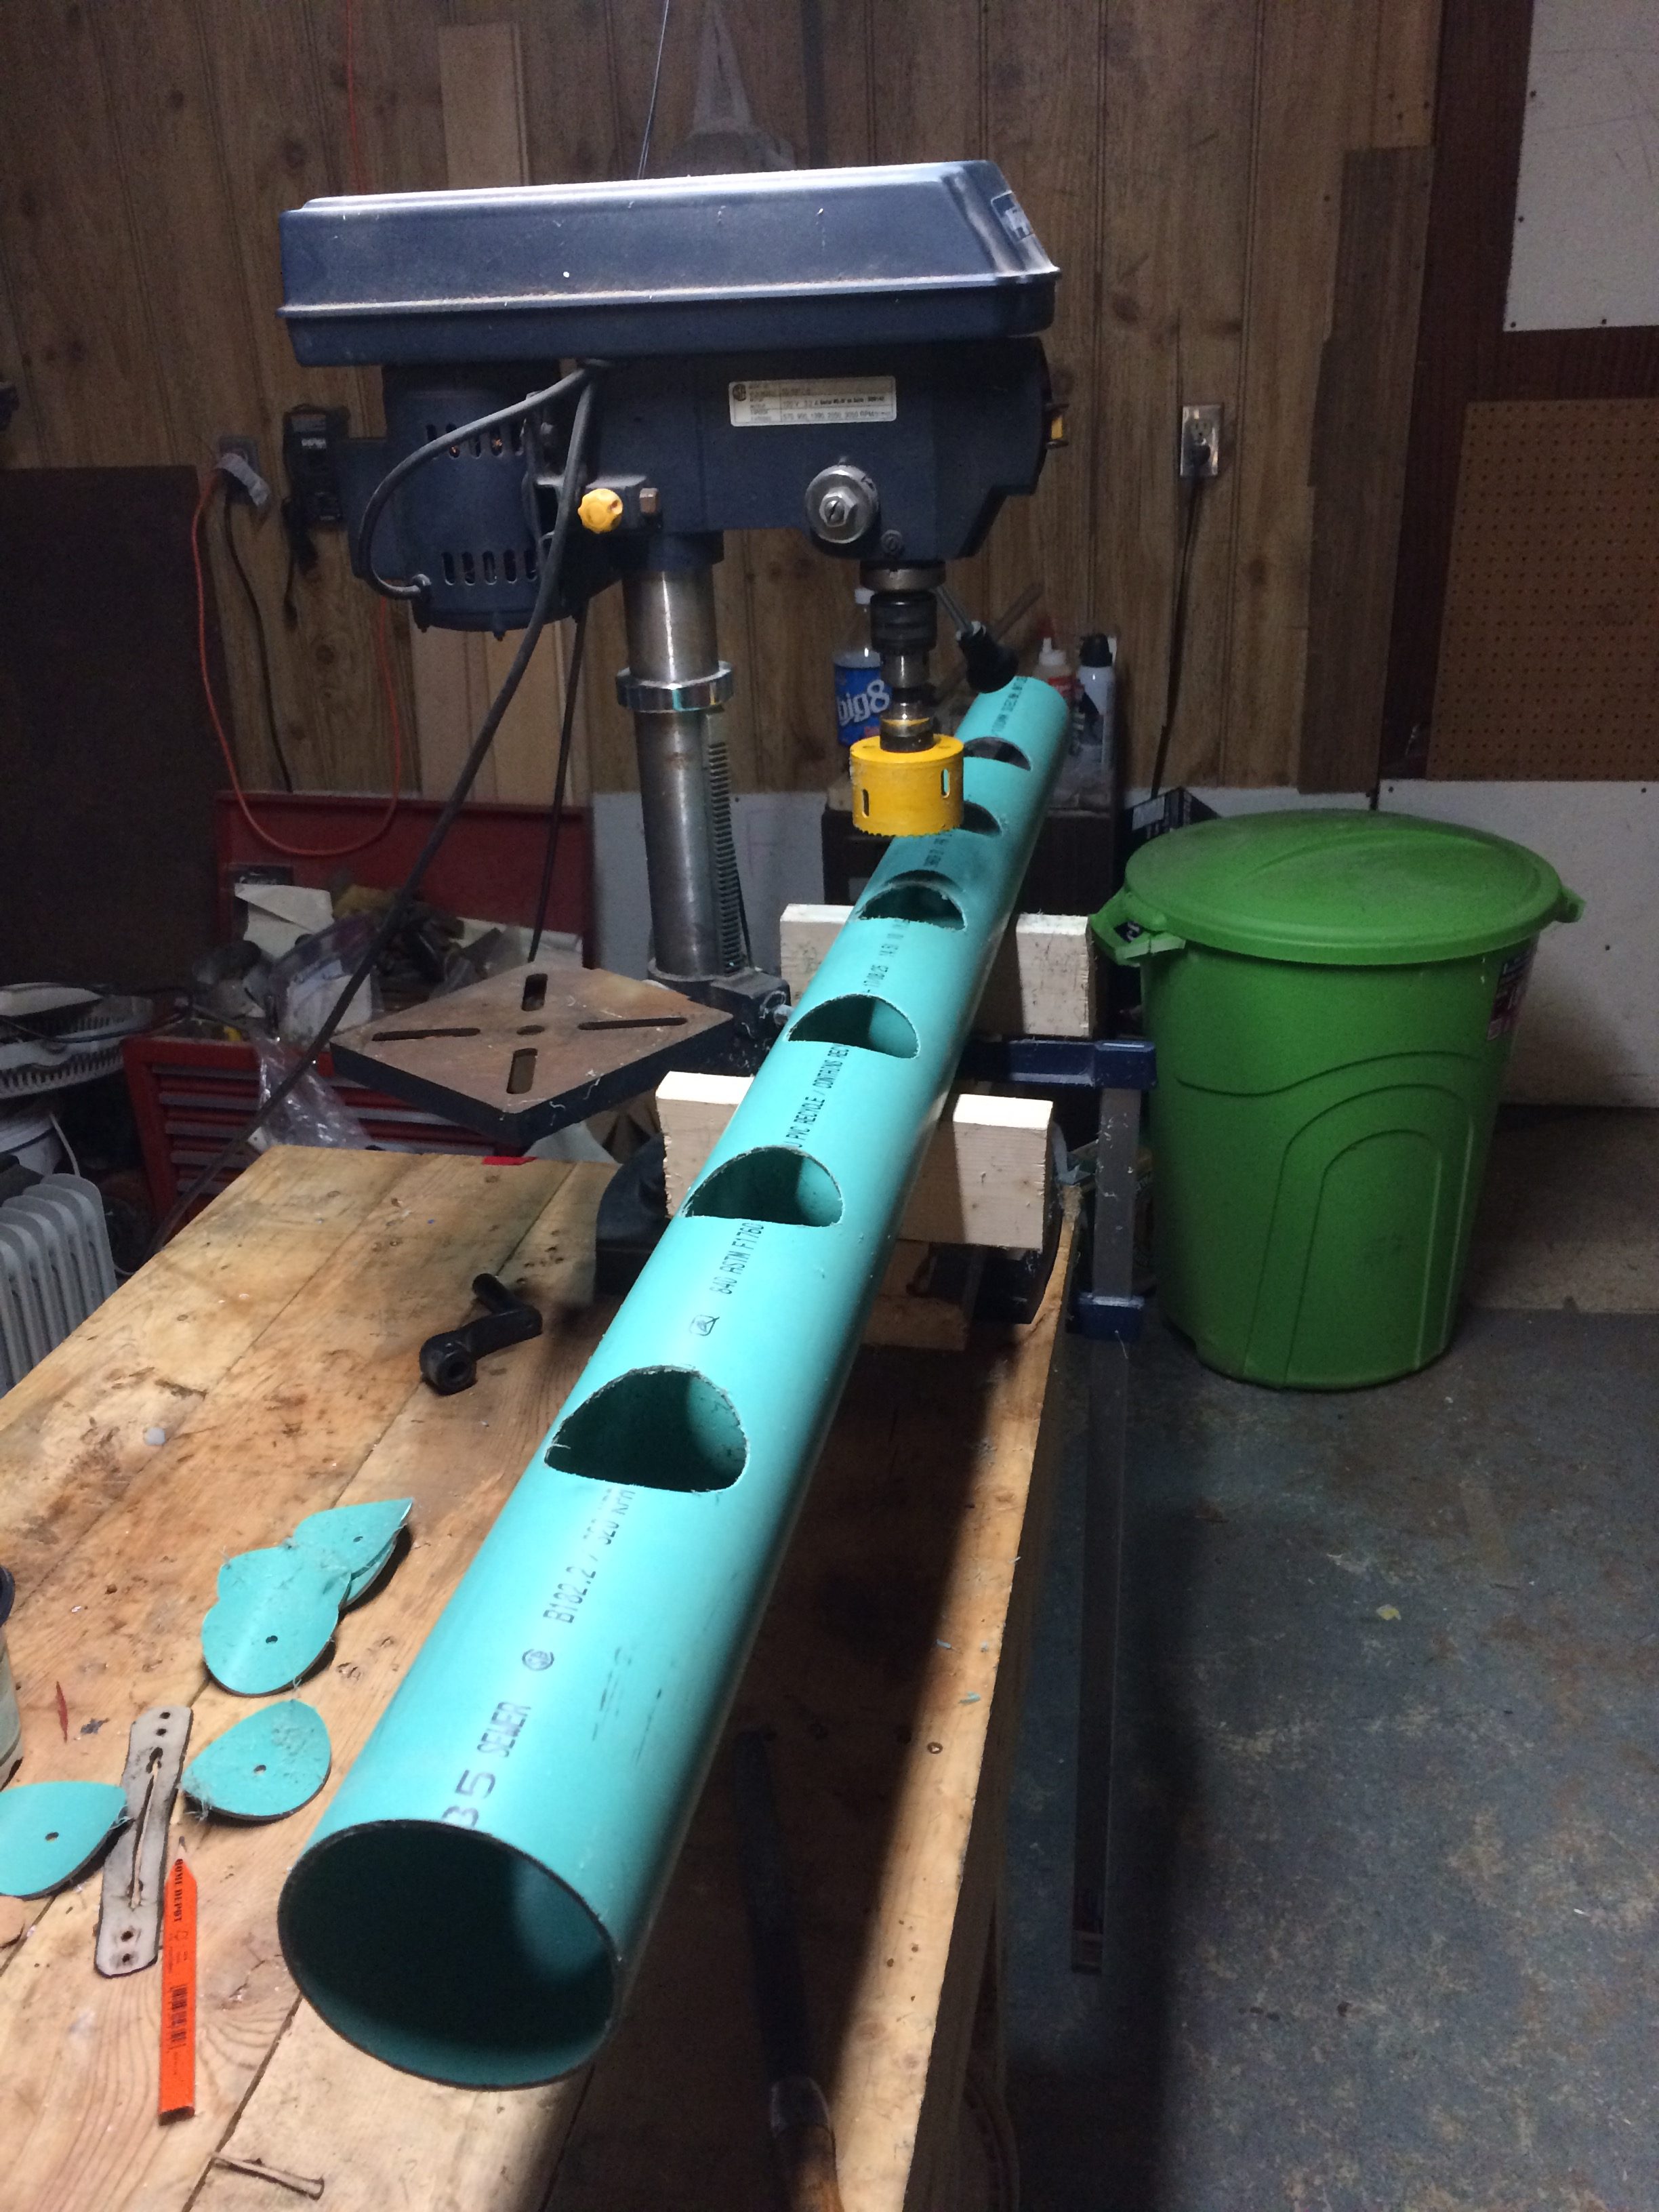
As I noted in the last article, the grow-pipes are 100mm / 4in diameter. These are PVC “thin wall”, and not SCH-40; that would have been far too expensive and not really added any value. Every 150mm / 8in along the pipe, I’ve used a hole-saw in a drill press to put a 75mm / 3in hole in the pipe.
A 75mm / 3in “net-pot” is set in each of these holes. The net-pot has the plant or seeds placed in them, and then is filled with standard “hydroton” expanded clay pellets. As water floods the grow-pipe, it also floods the bottom 50% – 60% of the net-pot, ensuring that the seeds or roots get a fresh dose of nutrient-rich water. When the water drains out of the pipe, then fresh air is delivered to the roots, ensuring that a good balance of moisture and oxygen is maintained for the plant.

The grow-pipes are suspended over the three water tanks on a 50mm x 100mm (2in x 4in) lumber frame. Each pipe is about 3m / 10ft long, and runs from the sump end of the set to the fish tank end. The reason for the 50mm x 100mm lumber, of course is that each pipe when filled to 80% capacity will hold around 20kg / 50lbs of water, and we plan to have 4 to 6 of these pipes when the system is fully built out. That means that the frame will be dealing with the dynamic, cyclic loading and unloading of up to 180kg / 300lbs every fifteen to twenty minutes.
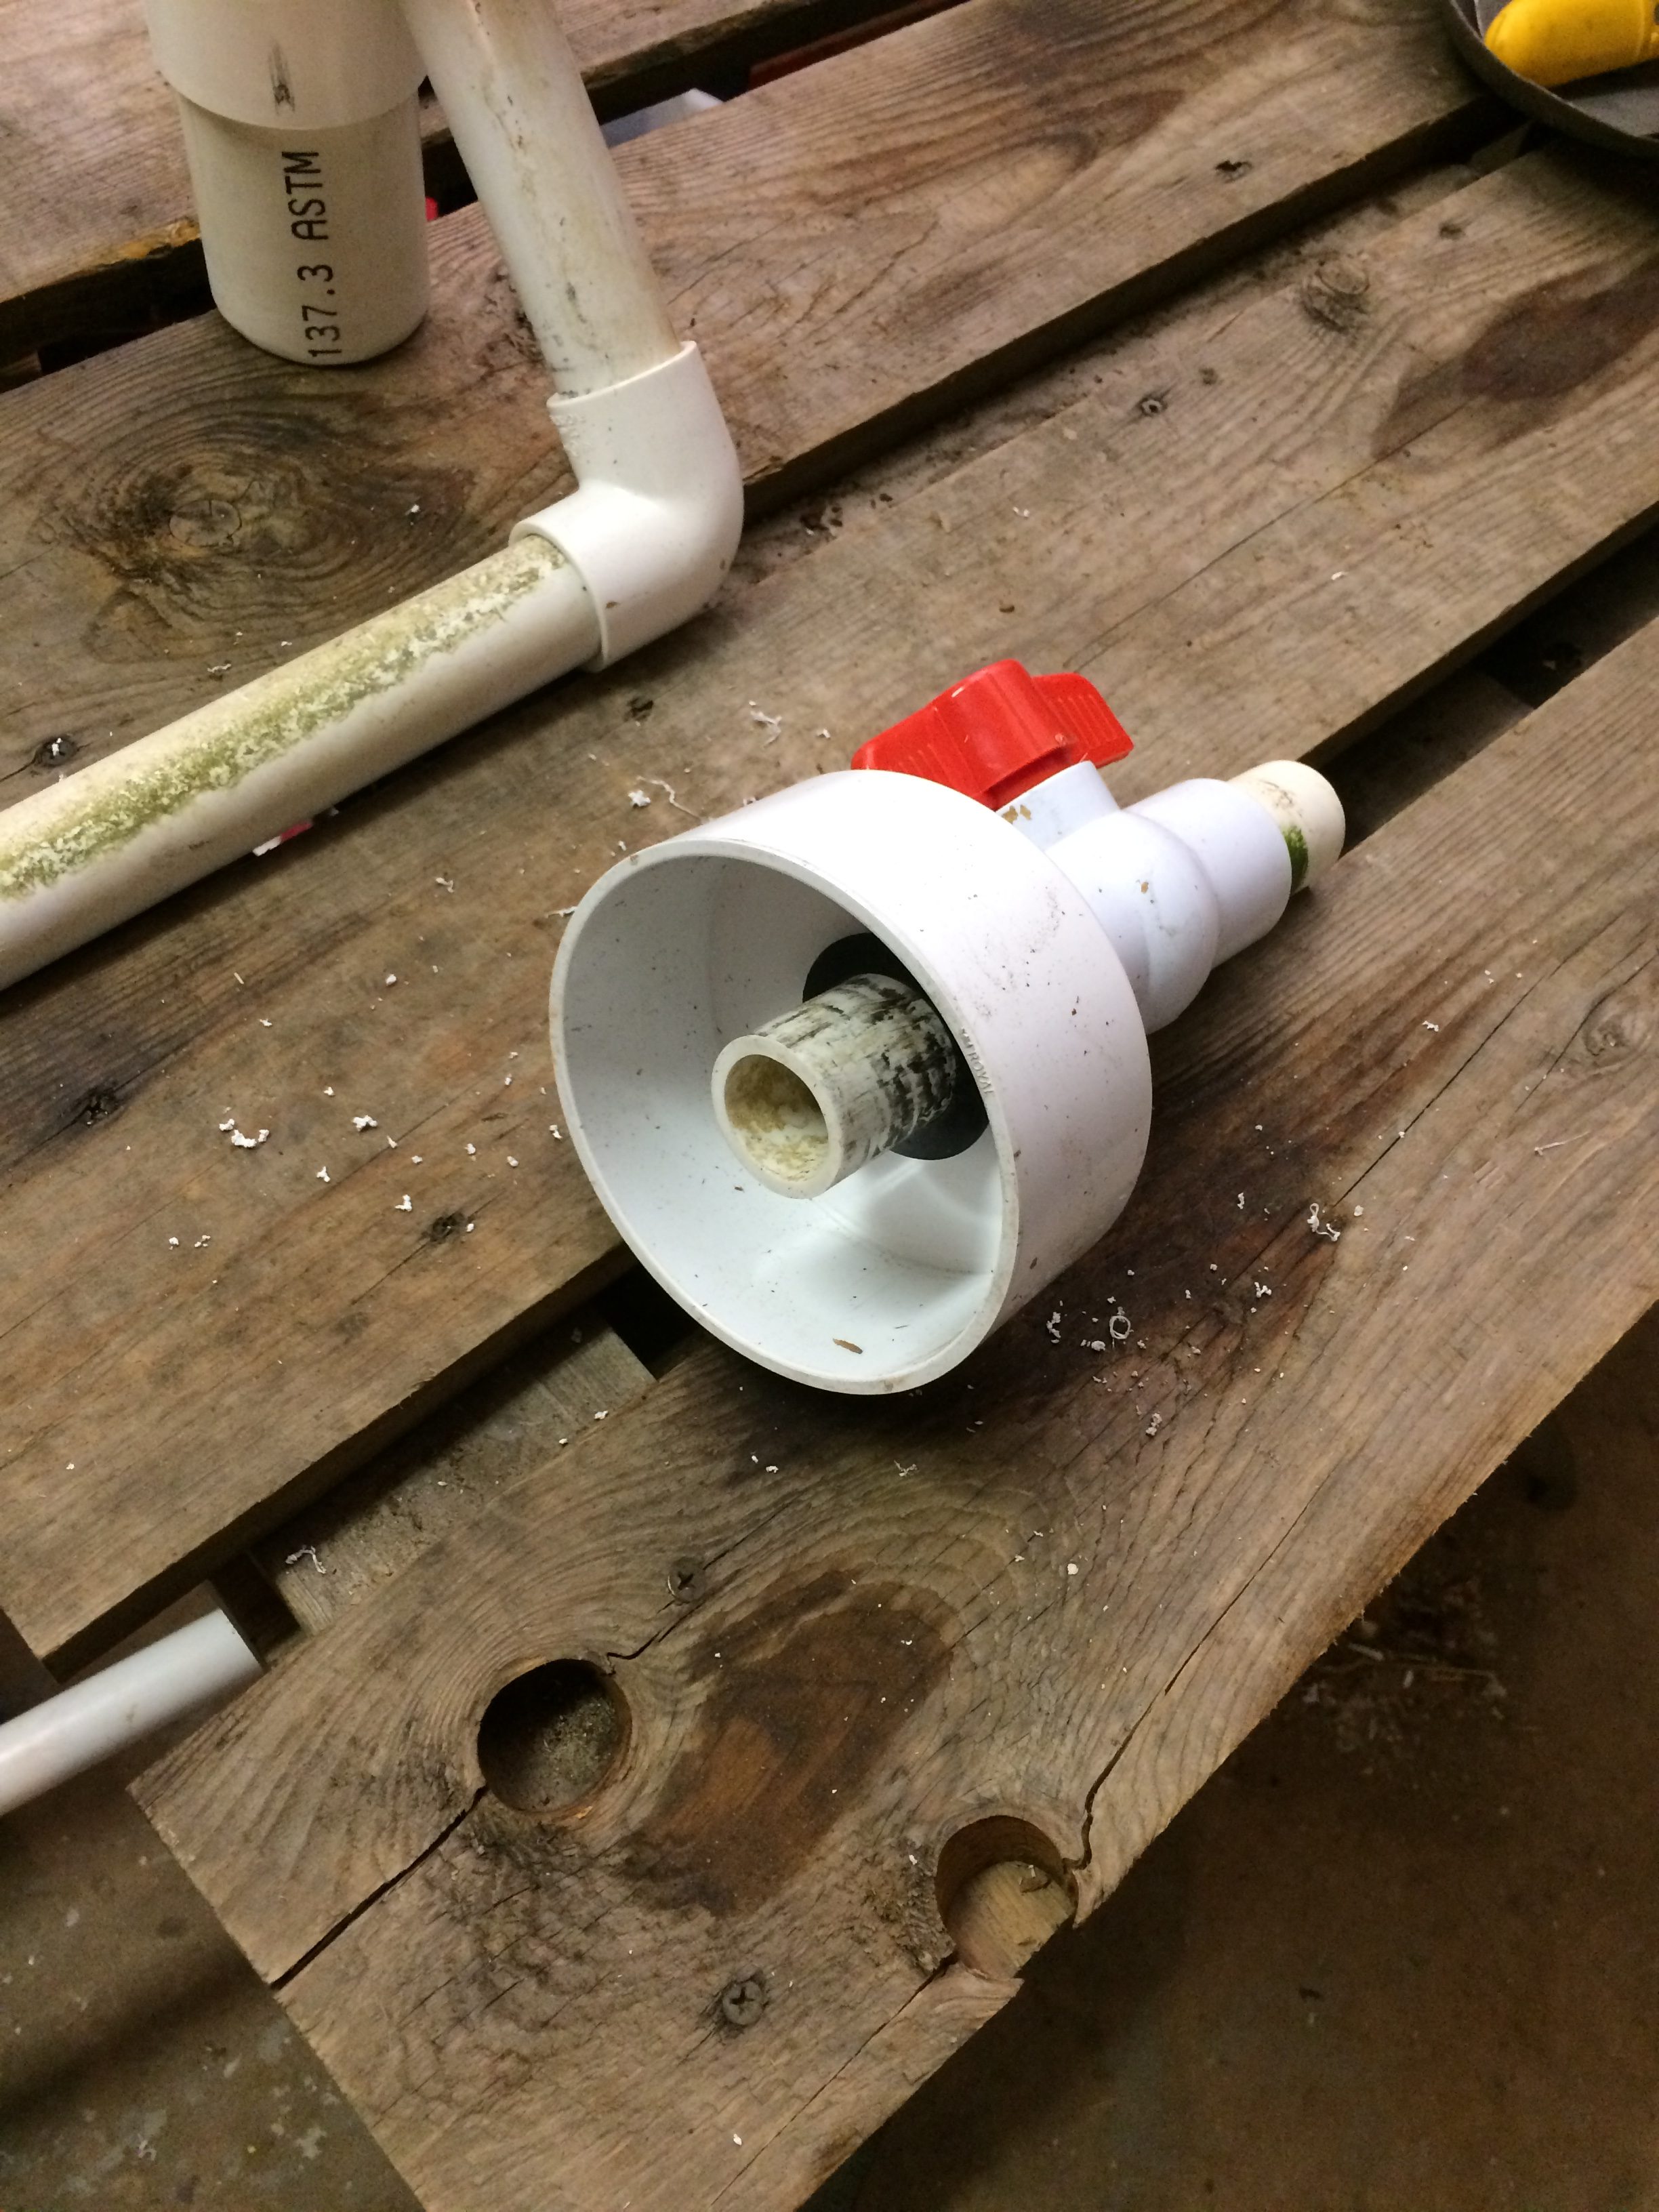
At the sump-end of the pipe is a 100mm / 4″in PVC end-cap, press-fit into place with a rubber mallet. The end-cap has 25mm / 1in SCH-40 pipe put through the centre of it, via a “Uni-Seal” rubber fitting. The 25mm pipe is “bare open” into the 100mm grow-pipe.
On the outside of the grow-pipe is a 25mm SCH-40 PVC ball valve, with connects to the 20mm flex hose coming from the water pump below it, in the sump. The ball valve allows me to “tune” the flow of water into each pipe, so that I can get cycle times for each grow-pipe that are reasonable for the system.
The fish tank-end of the grow-pipe is a 100mm / 4in “Sweep-T” fitting, set so that the grow-pipe comes in the “side” of the T-fitting. The T-fitting is fixed onto the grow-pipe so that it is vertically plumb, and the top of the T-fitting has a bright orange “inspection cap” covering it to keep garbage out of the siphon well.
Be First to Comment