Hello, everyone. My latest home project is finally a sloshing success and I figured I’d take a few minutes to update the blog with what I’ve done, why I’ve done it, how it was done and what pitfalls I encountered and lessons I learned.
So what’s Aquaponics?
Aquaponics is humans figuring out that Nature knows what it’s doing, and trying to duplicate it. If you take a look at a natural lake with fish in it, you’ve got the idea of how it works. The fish produce fertilizer rich water, that is poisonous to them. The plants growing in the water filter out the poisons and use them as fertilizer, feeding the plant. The plant returns the now clean water to the lake, rejuvenating the fish’s environment.
Aquaponics Test – Beta V1
We’re doing the same thing, only it’s with a fish tank and a greenhouse. “Small” production systems literally have a couple of tonnes of water in them, and a proportionate amount of fish and growing space for plants. I’m not doing anything quite so large to start. Firstly, I like to tinker and make sure I understand something. Secondly, I’ve done a fair amount of reading, and there are a lot of catastrophic mistakes you can make with your first system. So, this little rig, totaling around 120 litres of water, is my mad science lab. If I completely botch it, the worst I am out is some seedlings plus a half-dozen fish and I get recovered and restarted pretty quickly.
So what’s the point?
If all goes well, by the end of November, I’ll be able to harvest everything needed for a fresh garden salad to serve four people, every week. So, through out winter, we won’t be buying imported lettuce, cayle, radish, and the like. It’ll be growing right here, organically, in our home. Before this time next year, we’ll be able to add fresh fish to the menu every couple of months. By this time next year, the system should have paid for itself in terms of groceries harvested, not bought. If that is the case, then I’ll crunch some numbers and very possibly indulge my serial entrepreneur nature and drop around $5000 on a commercial system that will generate organic fish and vegetables for local restaurants.
Building the Test Project
I did a lot of reading before deciding to undertake this. I’m a “Doubting Thomas” by nature, and if something sounds too good to be true, I tend to go out of my way to try and prove that’s the case. So while I have read a lot of material that says this works wonderfully, until I see it work for myself, I’m a skeptic.
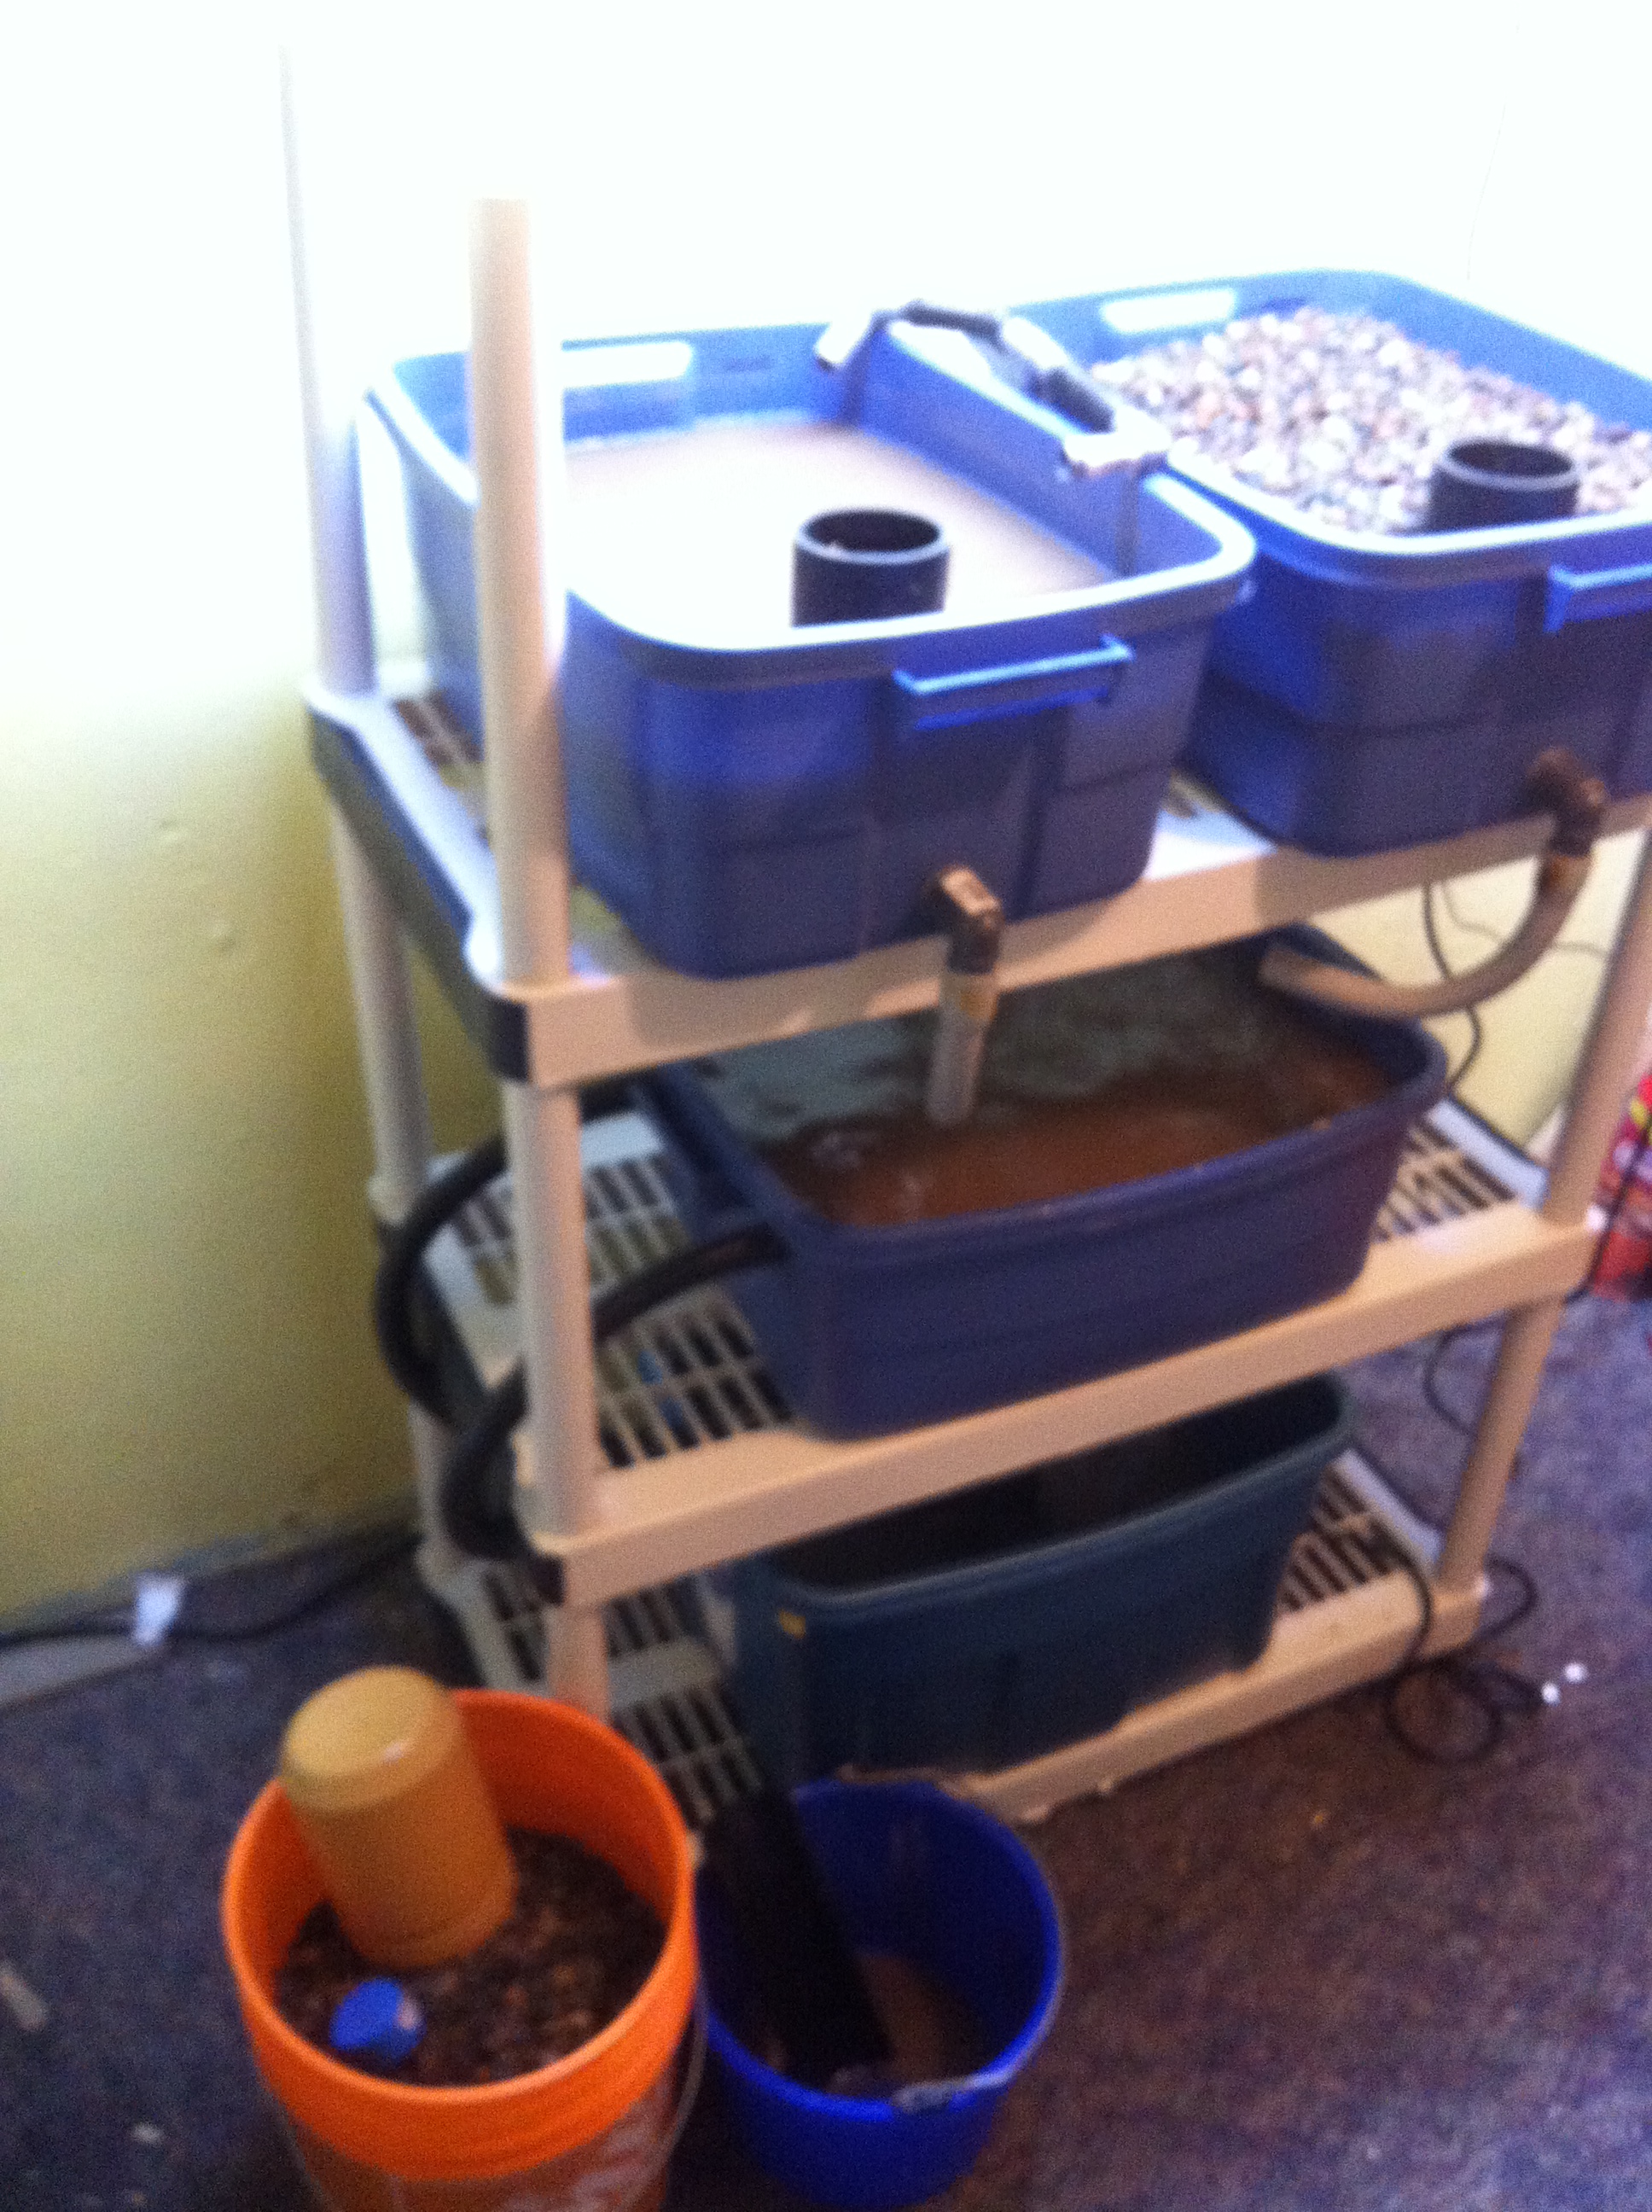
The basic system is a set of plastic storage containers, a high strength storage shelf, a grow light, a pond pump, and some pond hose. At the top of the rig are a pair of 38 liter totes, under an LED grow lamp. These will be the “grow beds” where the plants are. The beds are a mixture of charcoal and gravel; there is no earthen soil in them. The plants get the nutrients they need directly from the rich water the beds are periodically flooded with. The gravel and charcoal is there to give the roots something to hang onto, and a place for important bacteria to flourish.
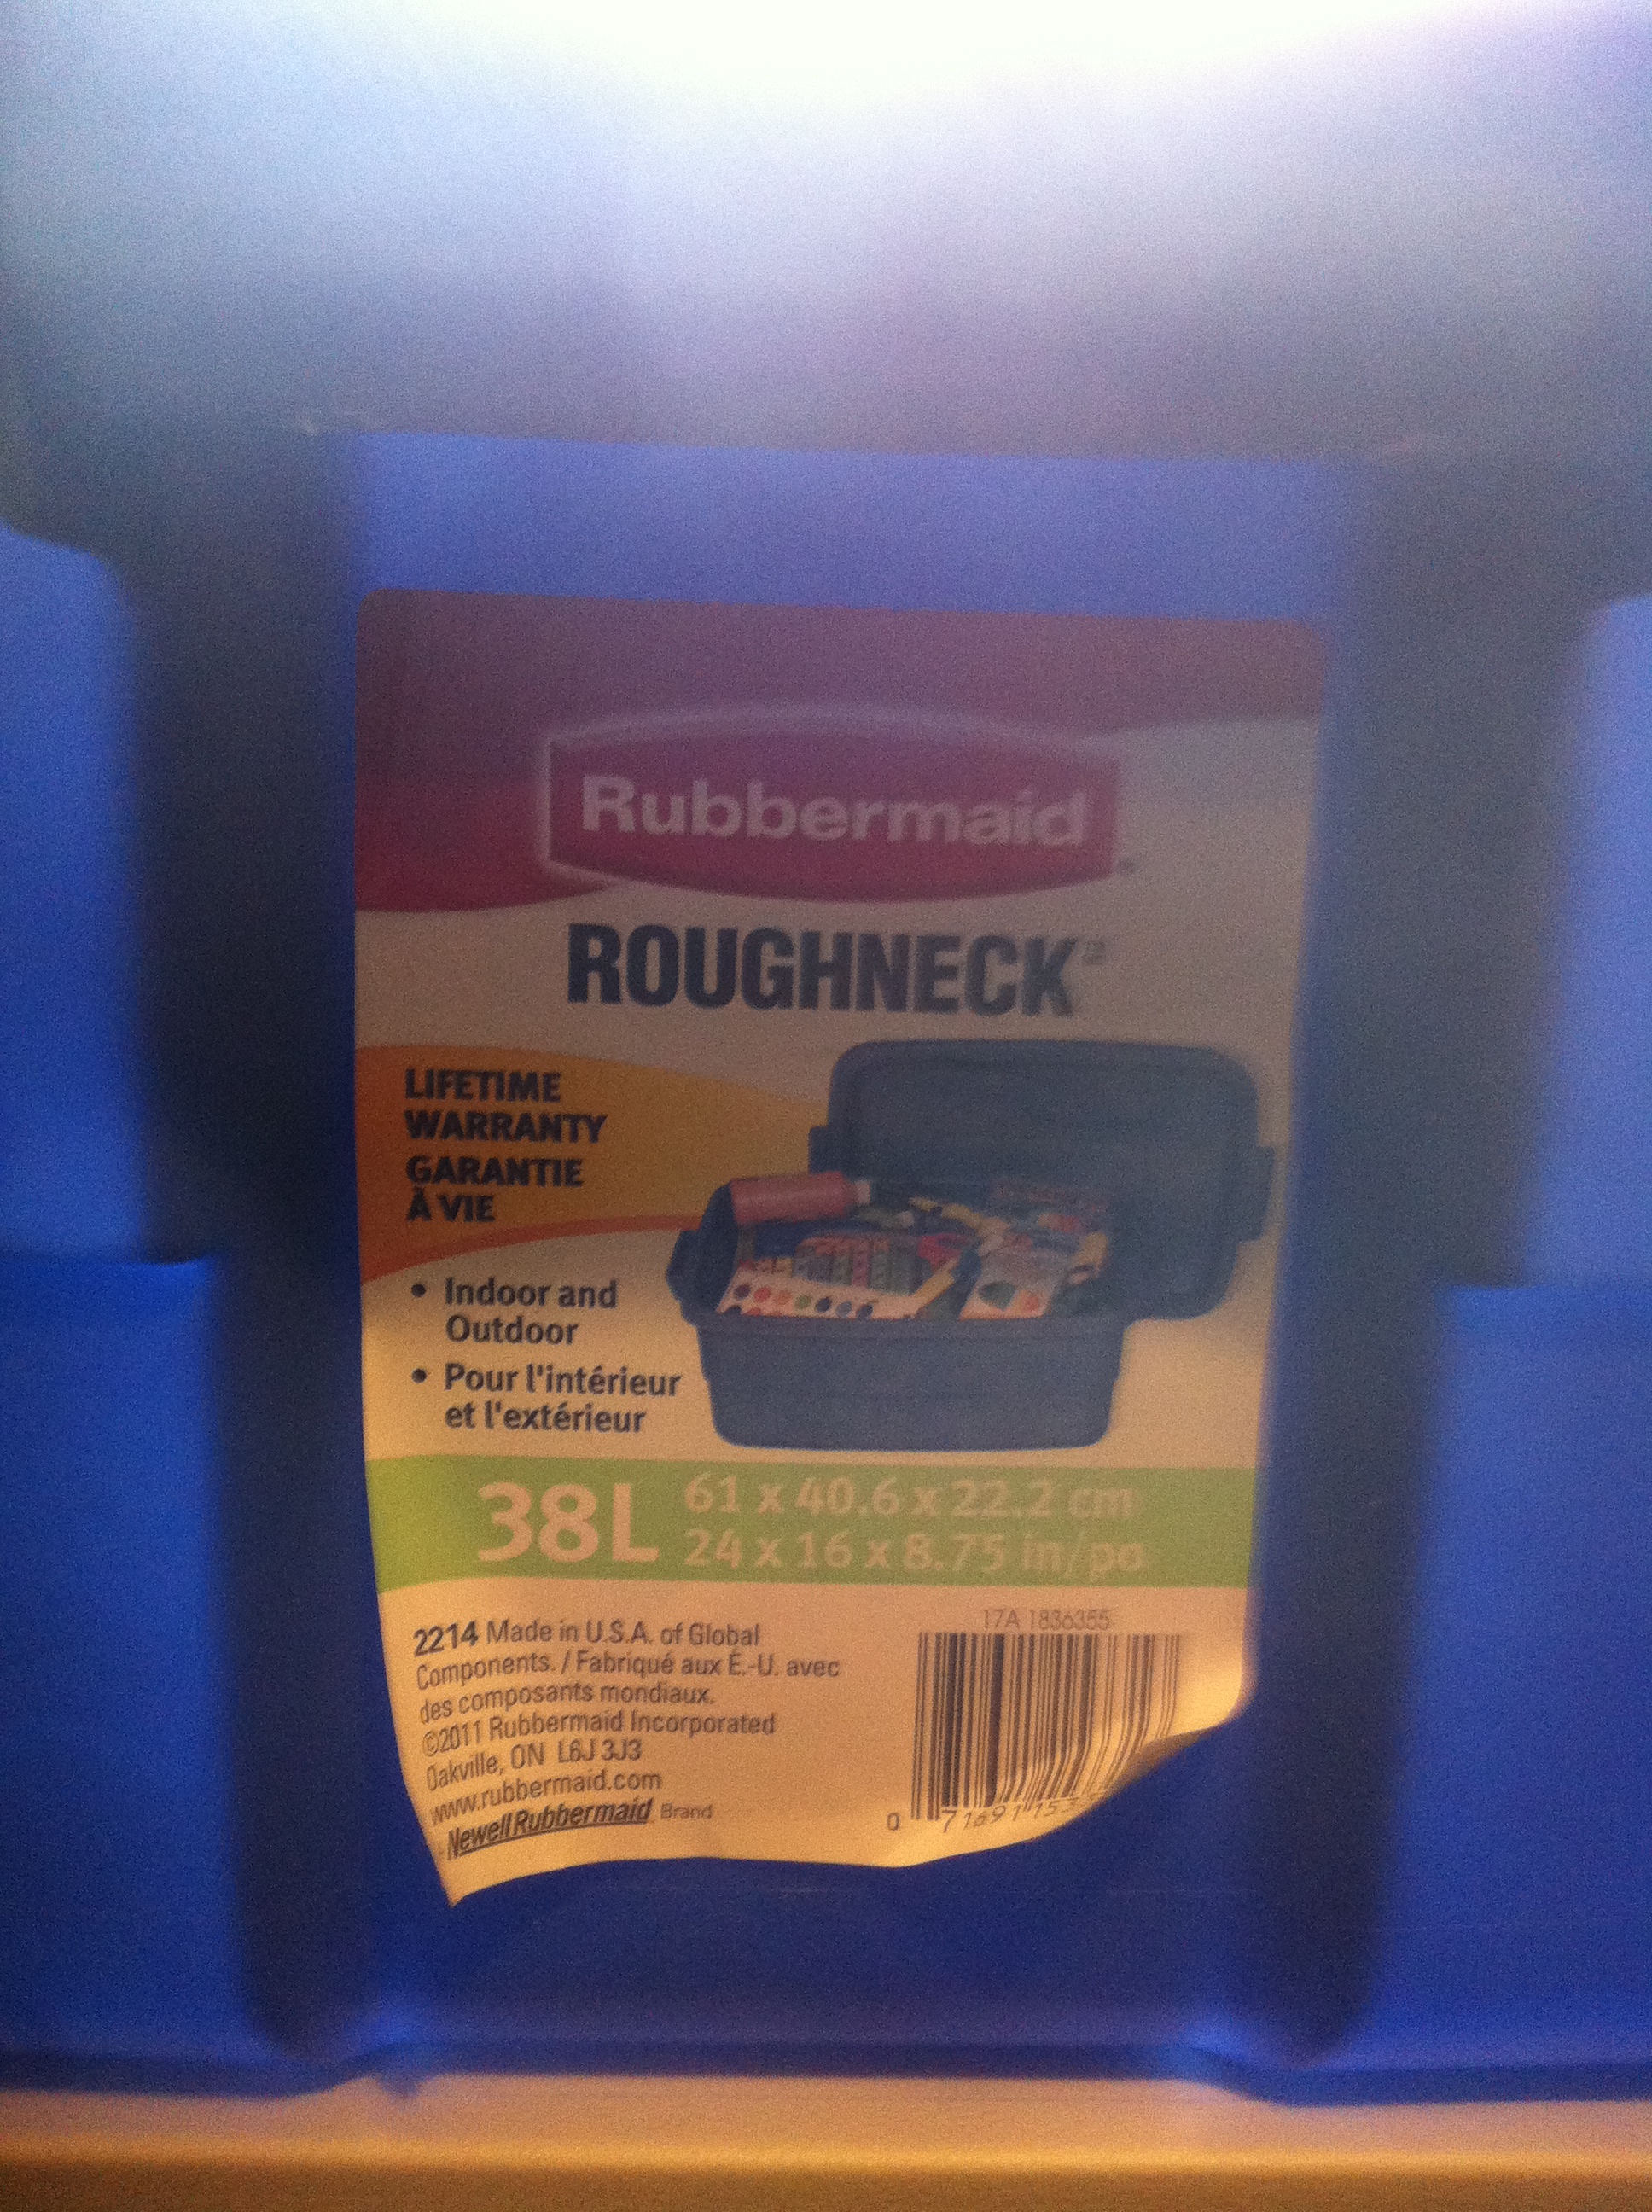
Rubbermaid Roughneck 38L
These two beds are emptied by a so-called “bell siphon” that drains each bed to within about 20mm of the bottom automatically. It just uses gravity and fluid dynamics; no electricity runs it. The water draining from the two grow beds is piped into a 38 liter tote on the shelf below them, which is full of water with fish living in it. The influx of water drives a pair of skimmers; one top-feed and one bottom-feed. This pulls solid material and other waste products out of the fish tank and down a pair of hoses into the sump. As a result, the water level in the fish tank might only change at most by 15mm – 20mm out of ~188mm of water, giving the fish a very stable environment. The sump is much larger tote, capable of holding around 75L of water. It has the pond pump in it, which pulls the water through a foam filter and then hoists it up to the two grow beds to deliver fresh nutrients to the plants.
Live Weight
For those of you who don’t think of these things, 1L of water is 1Kg. That’s 2.2 pounds per liter. So the two totes on top, when full of water only, ring in at 76Kg / 167 pounds. When they are half full of pea gravel instead, that adds another 20Kg / 44 pounds per tote.
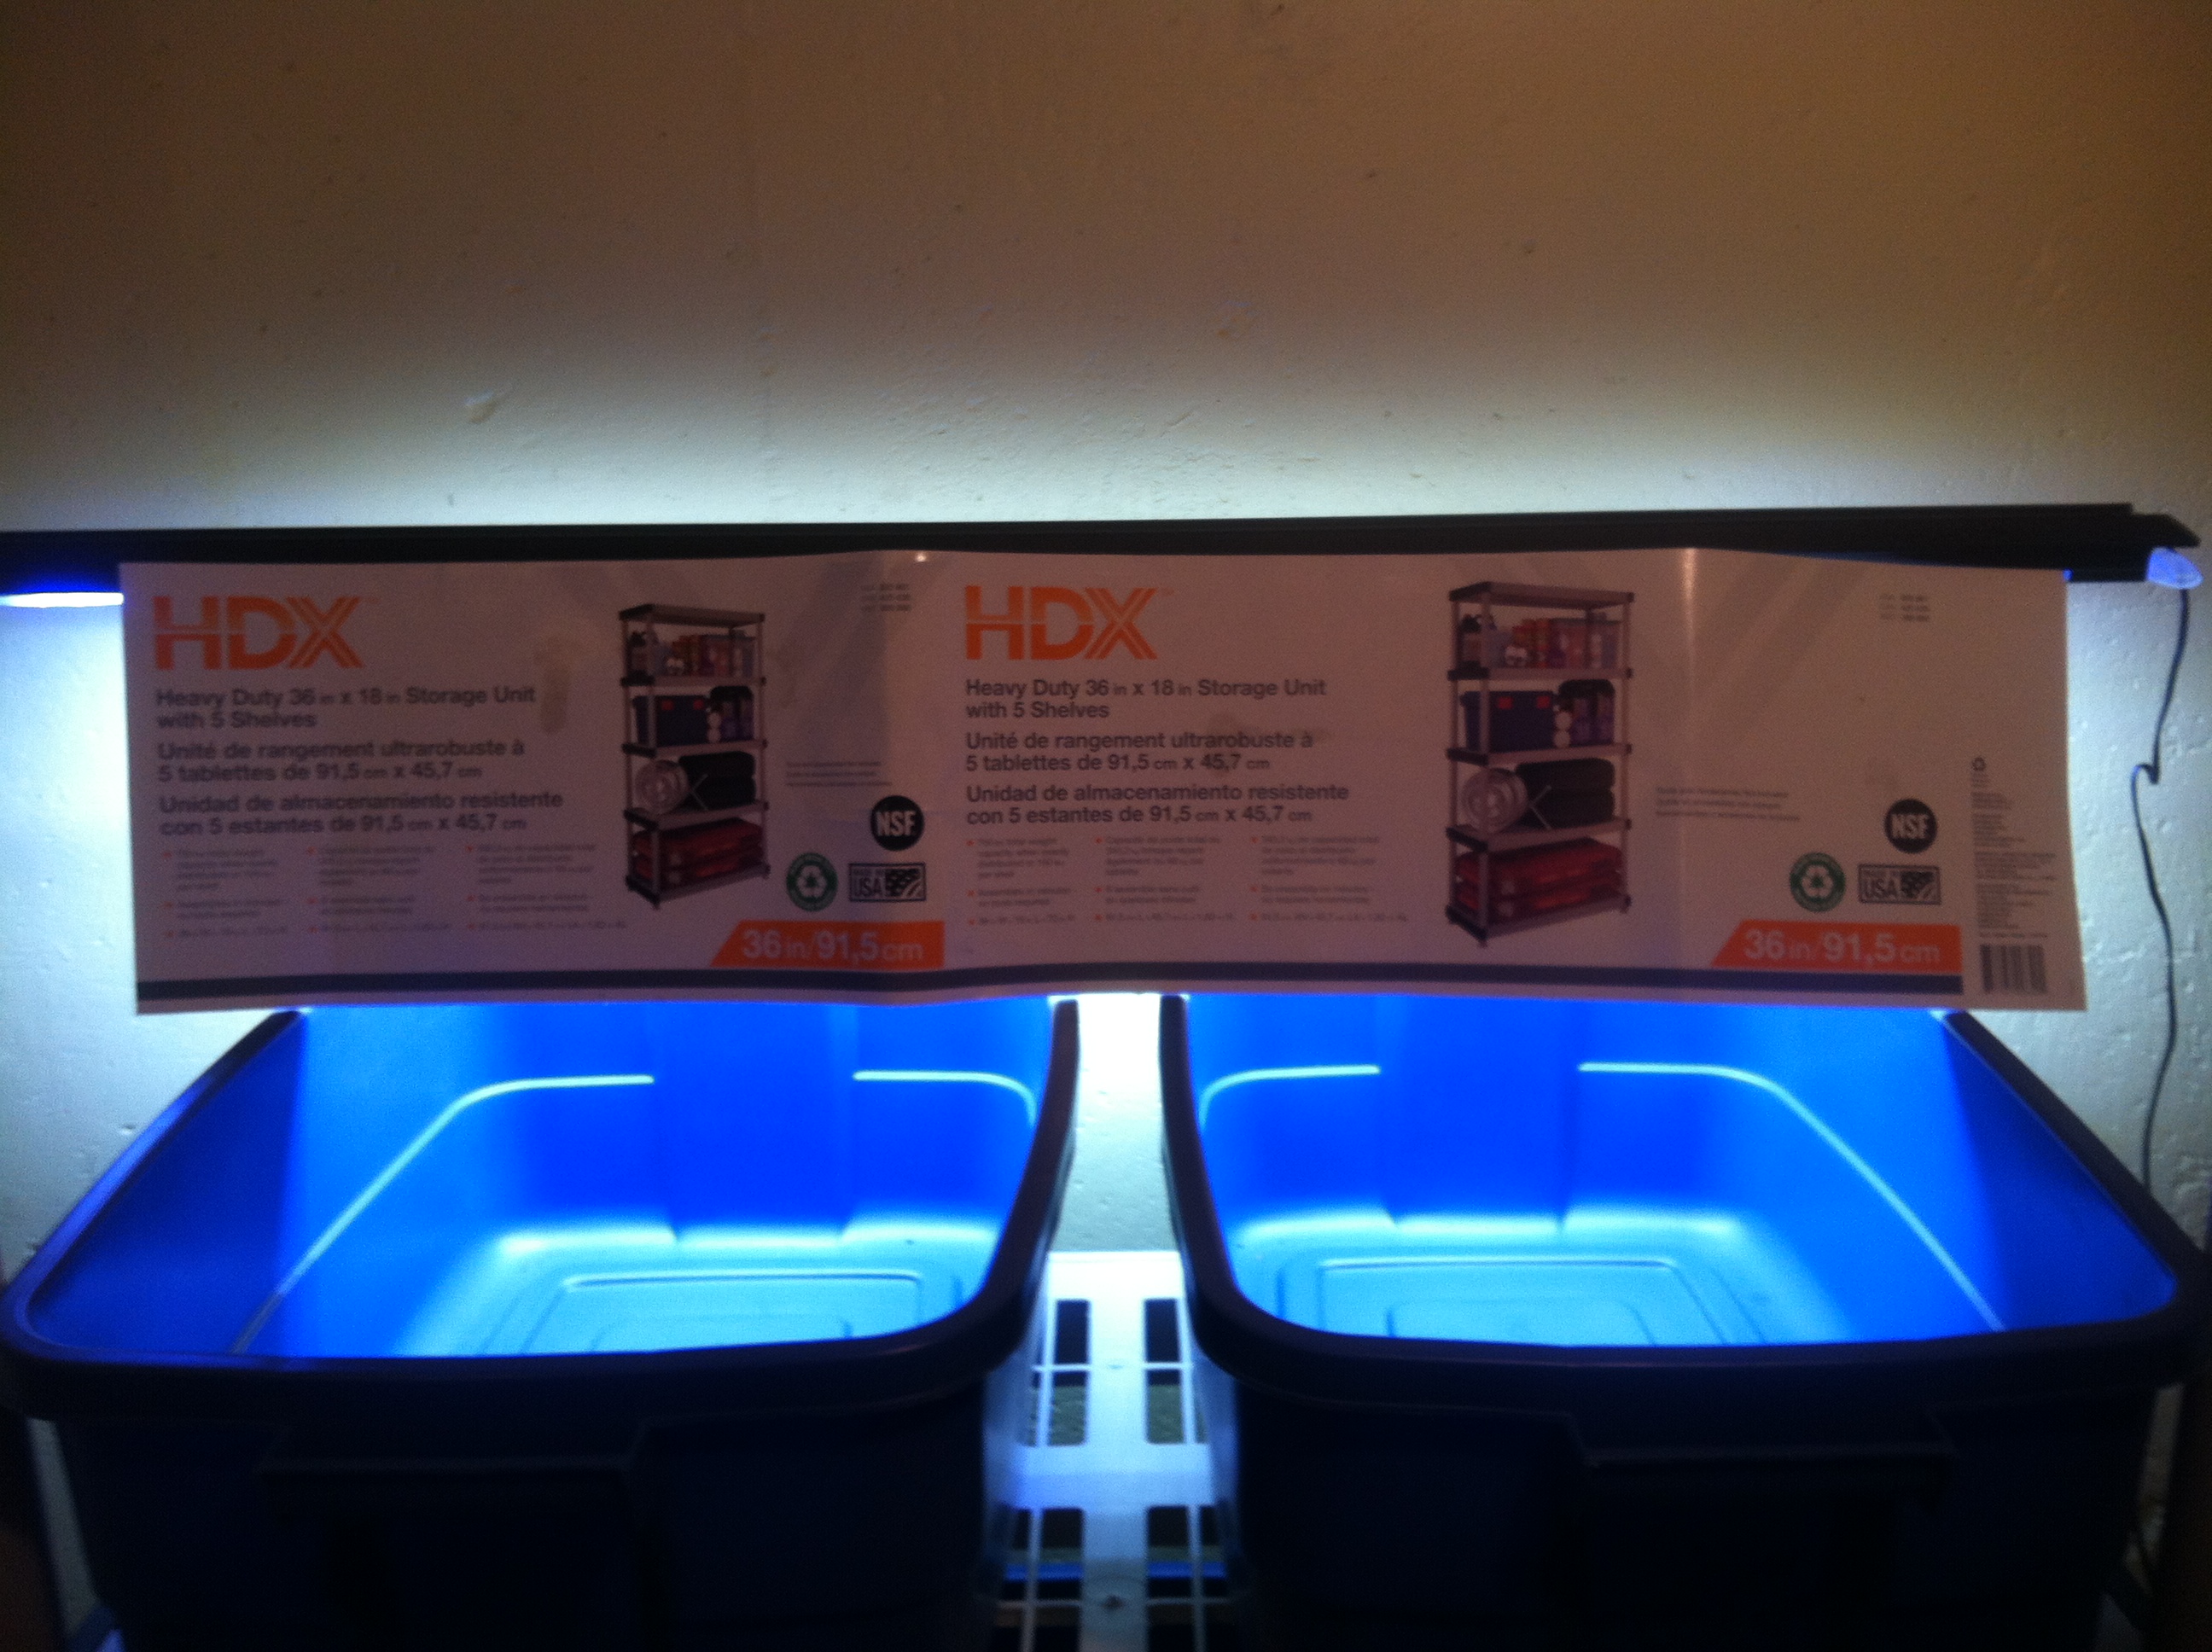
HDX Shelving Unit
Don’t skimp on the shelving unit. Trust me on this. 115kg/ 250 pounds per shelf is a minimum load weight. Otherwise, you’ll have several hundred pounds of water, charcoal and gravel on your floor in the middle of the night.

Site Layout Test
So the first thing I did was assemble the shelving unit, drop the empty totes on the shelves, and put the through-wall fittings (aka “Bulkheads”) where they were going to go. I then compared my mental tracing of the hose runs to my sketched plan, to ensure I hadn’t over looked anything. The shelving unit came with five shelves, and I only needed three, so I assembled the other two as another rack to the left. During construction, it was my local-area workbench. As things get up and running, out of the testing stage, it will be my storage area for related materials.
Bright Light, Big Silly

Fluval LED Grow Lamp
The very spiffy 230 LED grow lamp you see blazing away in these pictures is a story in itself. It’s a full-spectrum LED system and very bright. They usually retail for around $200, which would have put it out of my price range. I found it on the clearance rack at my local pet store for $45. That was too ridiculously good a deal to leave behind, given the timing. It got used for two or three weeks on a display tank in the store, and then they put it up for clearance. It’s a monster, really. It’s bright enough to be uncomfortable to look at directly. In these pictures, it’s sitting on the back two uprights directly. However, it the current “finished” configuration, it’s suspended from the ceiling above via a trio of 16ga wires looped through 1/8in eyelet bolts screwed into the cross-wood ceiling. The light weights about 4.5Kg / 10 pounds, and each of the loops are rated for 50 pounds. Short of an earthquake, that light is staying up there.

Fluval LED Grow Lamp Size Comparison
It easily spans the width of the two grow beds. In fact, if I had the system capacity for it, I’d be able light a third grow bed without difficulty. However, I’m limited by two factors. The first is footprint. I’d need to go get another full shelving set to add one more tote. That would be a bit pricey. My project target budget was $200 CAD.
Secondly, it means I’d likely need second tote for the fish. You see, there is a ratio of growing bed to water volume; it’s between 1:1 and 2:1, tops. So, two grow beds is about as big as I can go, without “starving” the environmental cycle of the ammonia and ammonium it needs to create the fertilizers for the plants. If the bacteria starves, the entire system drops dead.

Dry Visual Layout Test

Dry Visual Layout Test #2

Dry Visual Layout Test #3
Holes In Things to Hold Water
So, once I was satisfied with where the rig was going to sit – easy to work around, close access to a faucet for water, two 15A plug sets, concrete floor under the carpet, nearby floor drain – it was time to start making holes in stuff. All of the “down” water lines are 25mm / 1in “ID”. Going up, is 18mm / 0.75in; hypothetically, that means the ability to drain should always exceed the ability to fill. That’s a good plan to have; the only way I want water coming back down from the grow beds by gravity is inside a hose. From reading I’ve done and YouTube videos I’ve watched, I know you want to keep a bit of water in the bottom of the grow beds at all times. So, I measured up the diameter of the “Bulkhead” or through-wall fitting and drilled a hole through the plastic of the grow bed at one end of the tote.

Grow Bed ready for Bulkhead Fitting
Then, I put the fitting in. This is where some creativity was required. That piece is actually not for either ponds or plumbing. It’s actually for water-tight seals with electrical conduit. It comes in two pieces that screw together from opposite sides of the wall, squeezing a gasket to form a tight seal. They work very well for this job. So they just get pushed through the drilled hole, threaded side out of the tote, until it is snugly against the inside wall. Then outside threaded ring is screwed on slightly more than hand-tight. It takes less than two minutes and if you’ve got good wrist strength, you don’t even need a wrench. The next thing to happen was adding the inside components that would make up the core of the “bell siphon”. Two short pieces of semi-rigid flex hose were joined with an elbow to create the “stand pipe” that determines the height of the water in the grow bed. As the water crests the top of the stand pipe, it triggers the siphoning action that drains the bed down again. Or that is the theory, anyway.
One of those things that isn’t written anywhere is that you need to have the top of the standpipe perfectly level to the water’s surface. Otherwise, the siphon never triggers properly. It is almost impossible to get a curved piece of not-actually-completely-rigid flex hose to remain perfectly level to the water. This would be the first detail that caused me some noticeable headaches.
Pingback: Aquaponics Basement Test System – Video Blog Update for 11 April 2014 ¶ Split Horizons
Pingback: Ongoing Adventures In Aquaponics – June 2014 Edition, Part 1 ¶ Split Horizons