Introduction
Howdy, folks. For those of you who followed along with my 2018 Notes series, or are following me via YouTube on the 2019 play list, I wanted to take a bit of time and get a blog post put together. This is going to be a combination of a “Build Walk”, a “State of the System” report, a “Hopes and Dreams” discussion, as well as whatever else comes to mind as I’m writing.
Words of warning now; I expect this will be a long one.
The build plan for 2019
As you likely recall from the 2018 Backyard Aquaponics, I had remarkably high Nitrate levels in the system all summer. Essentially, with 60 plants growing vigorously all season, I had heaps of “plant food” left over in my water chemistry. Roughly, I guessed, I could triple the number of plants and still have reasonable water chemistry. So that’s what I decided to do.
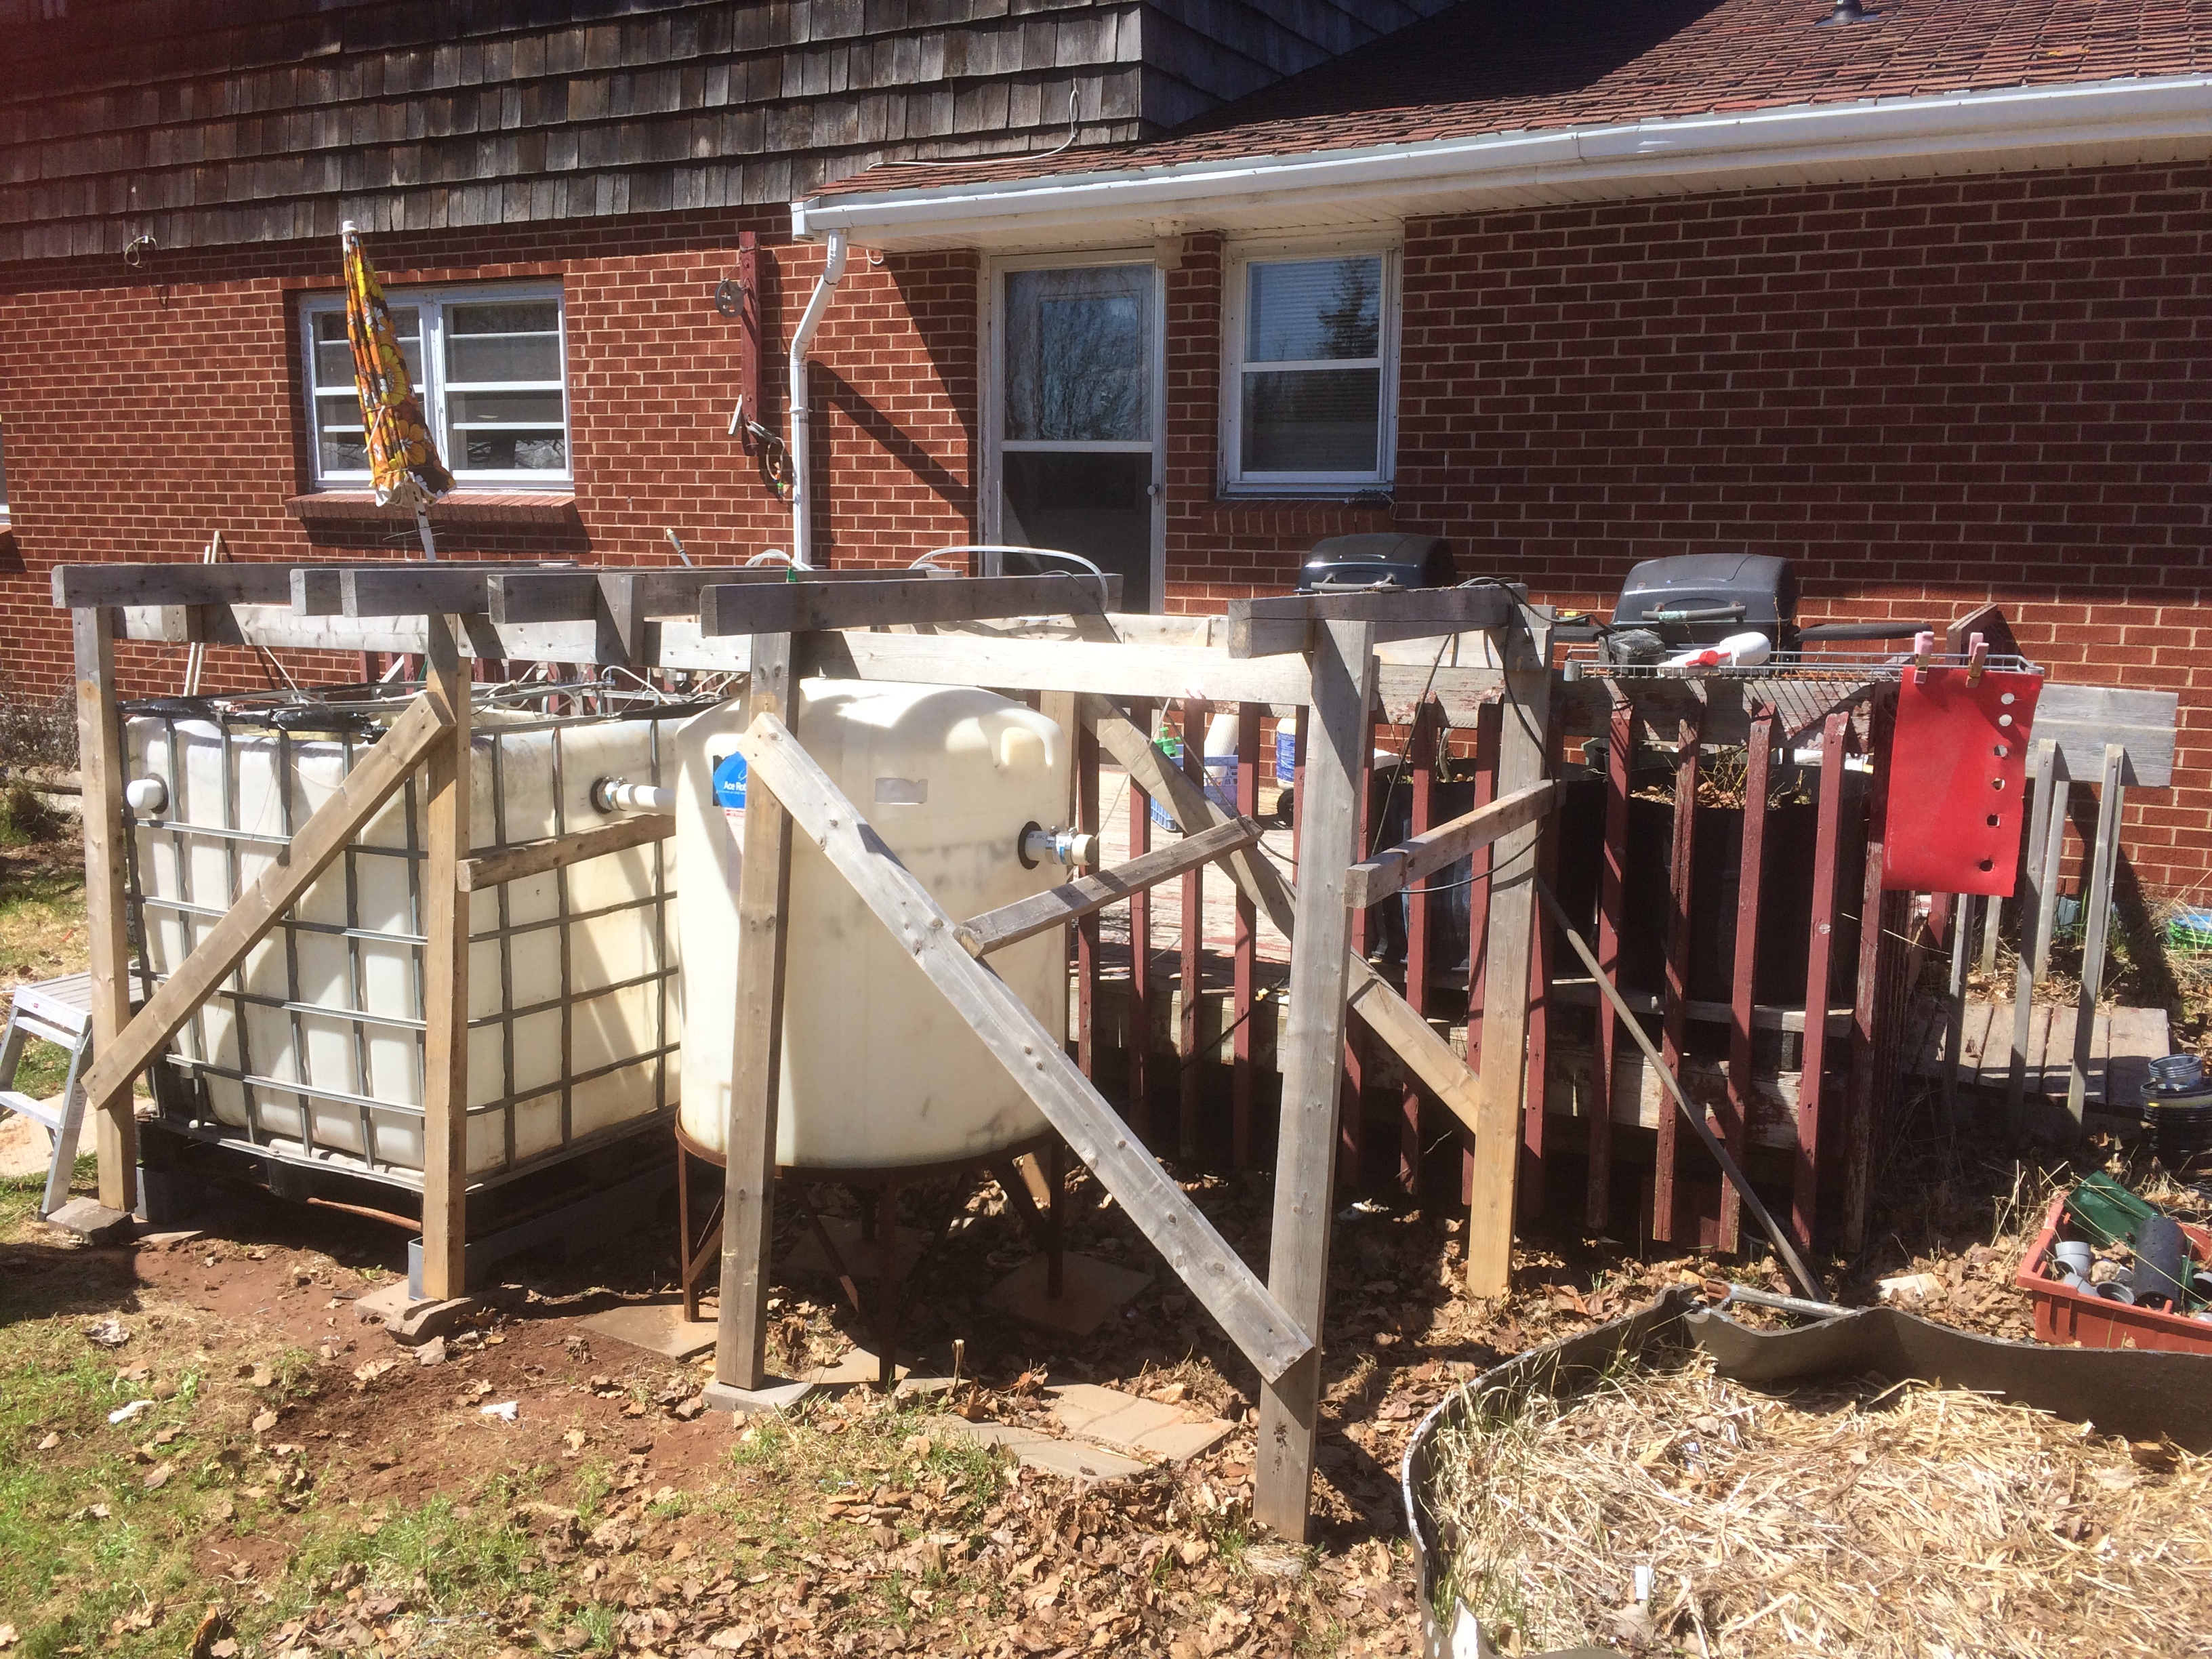
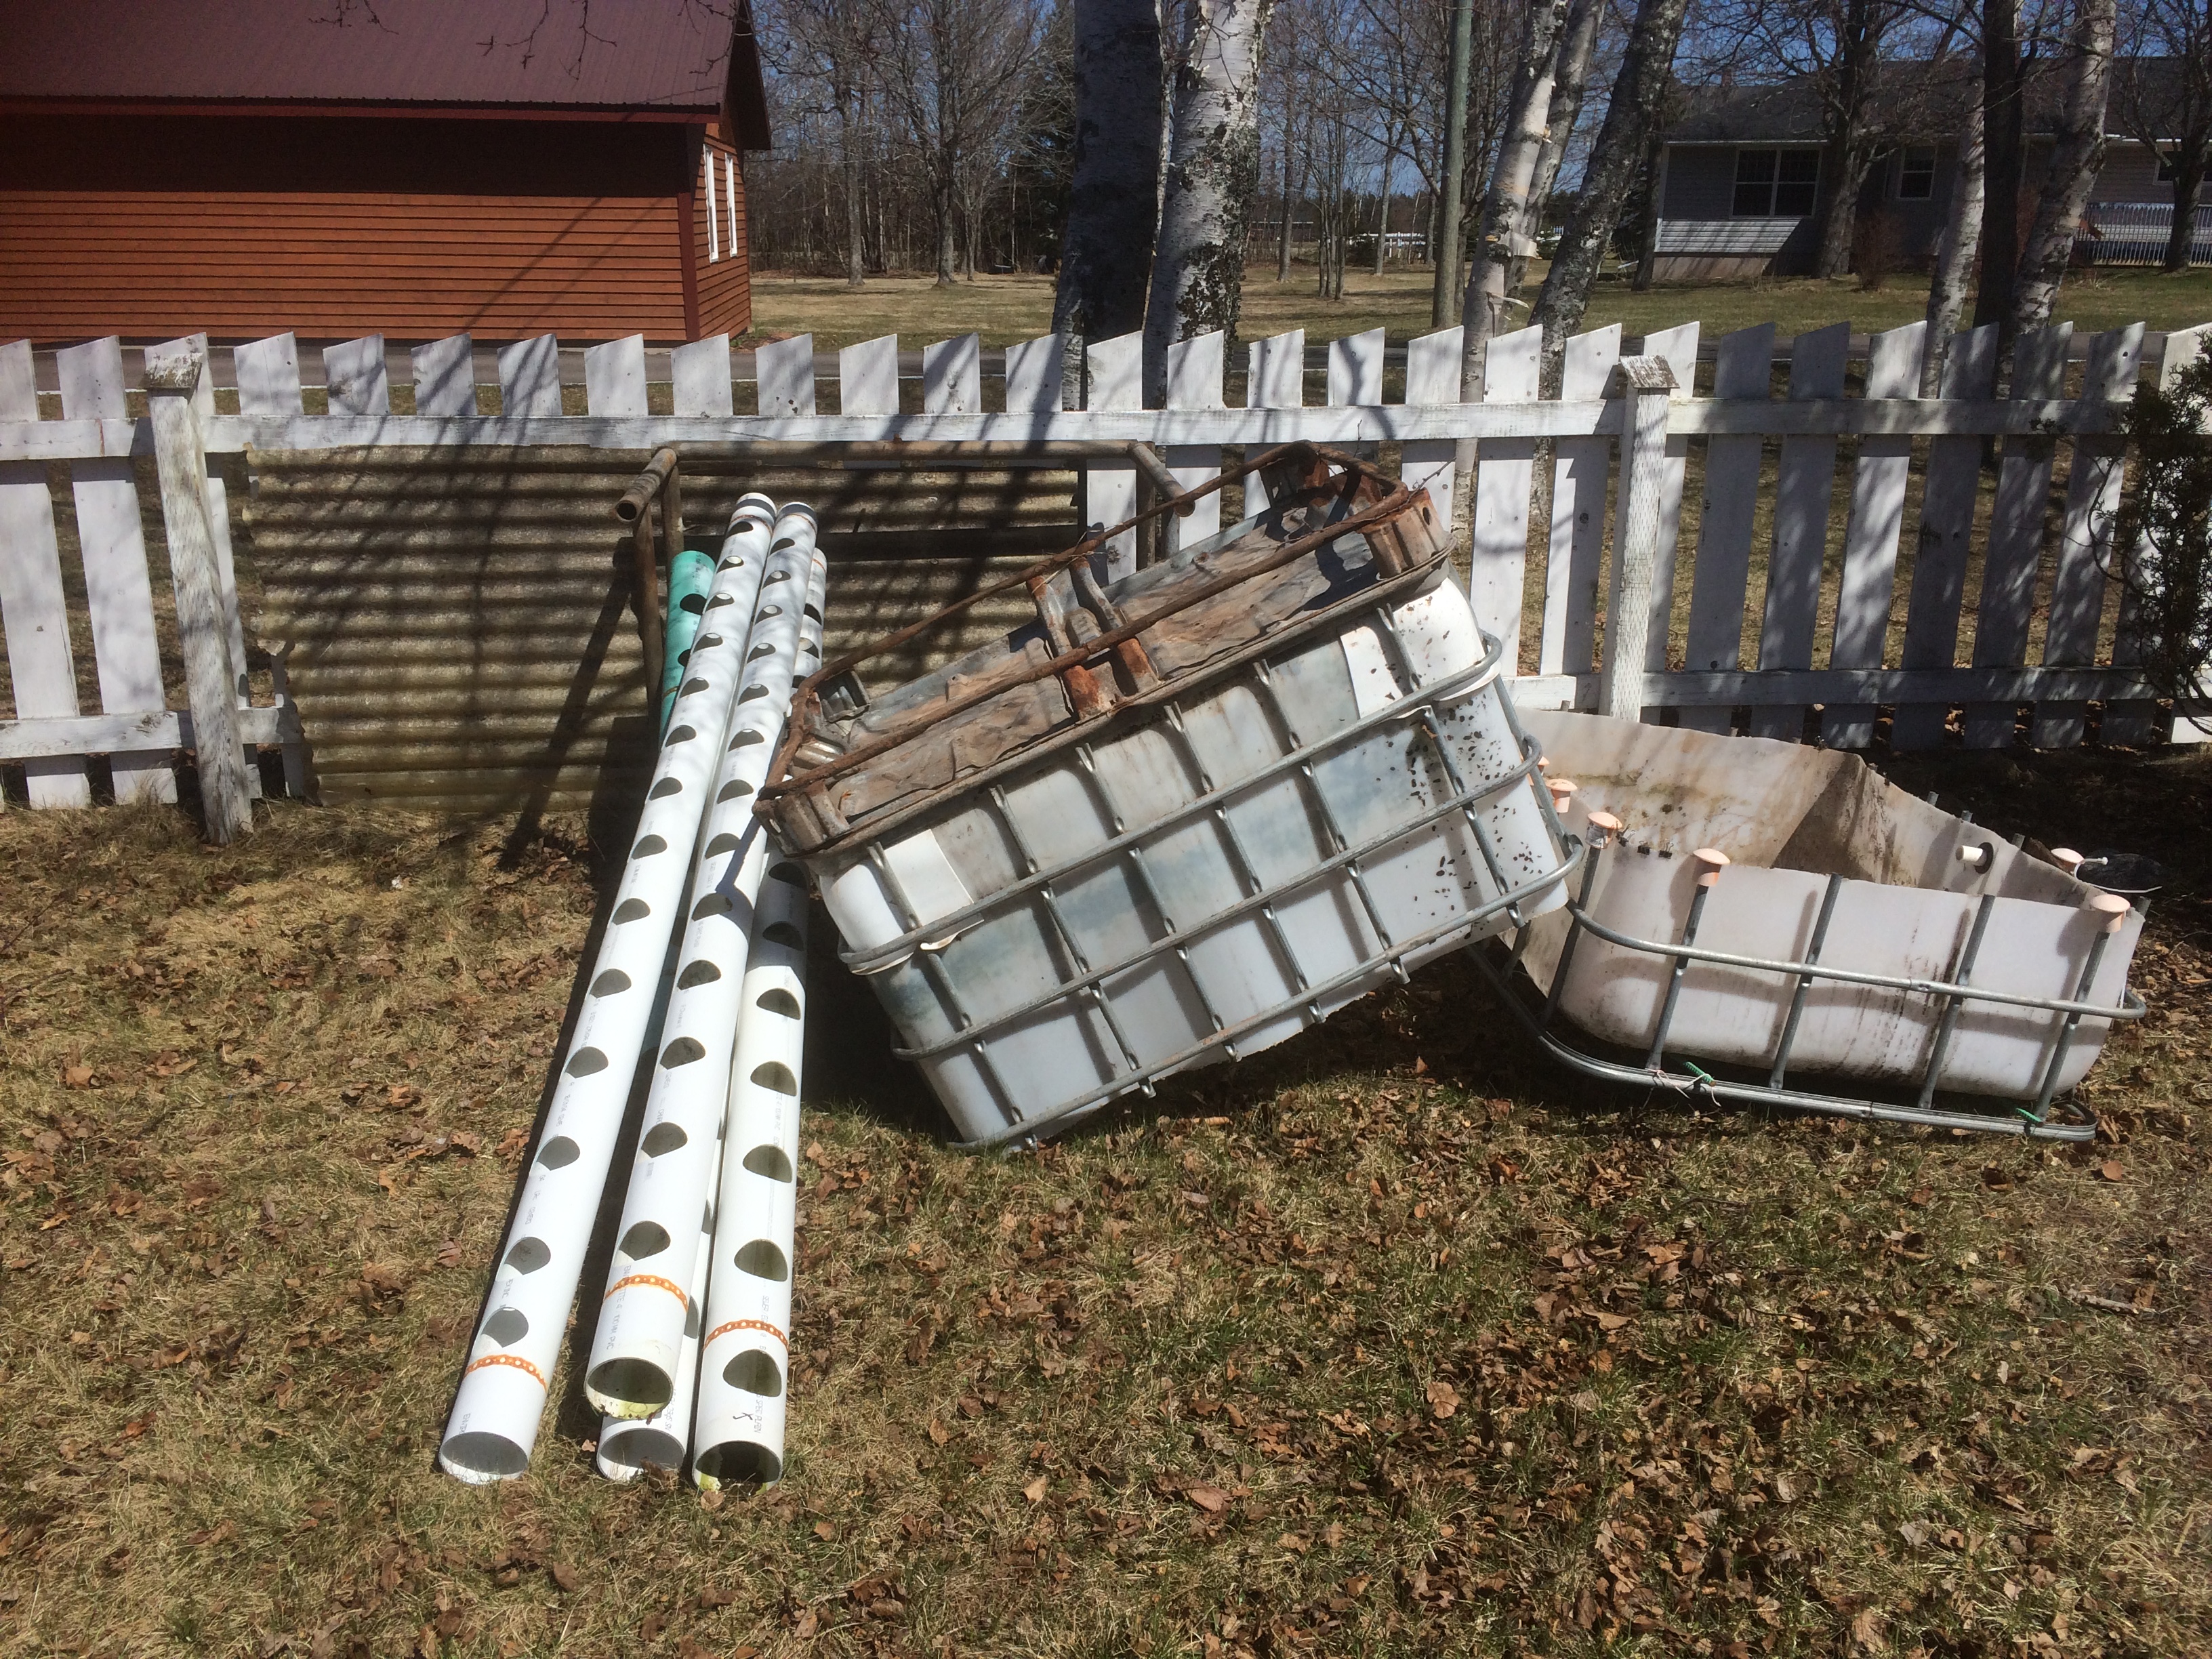
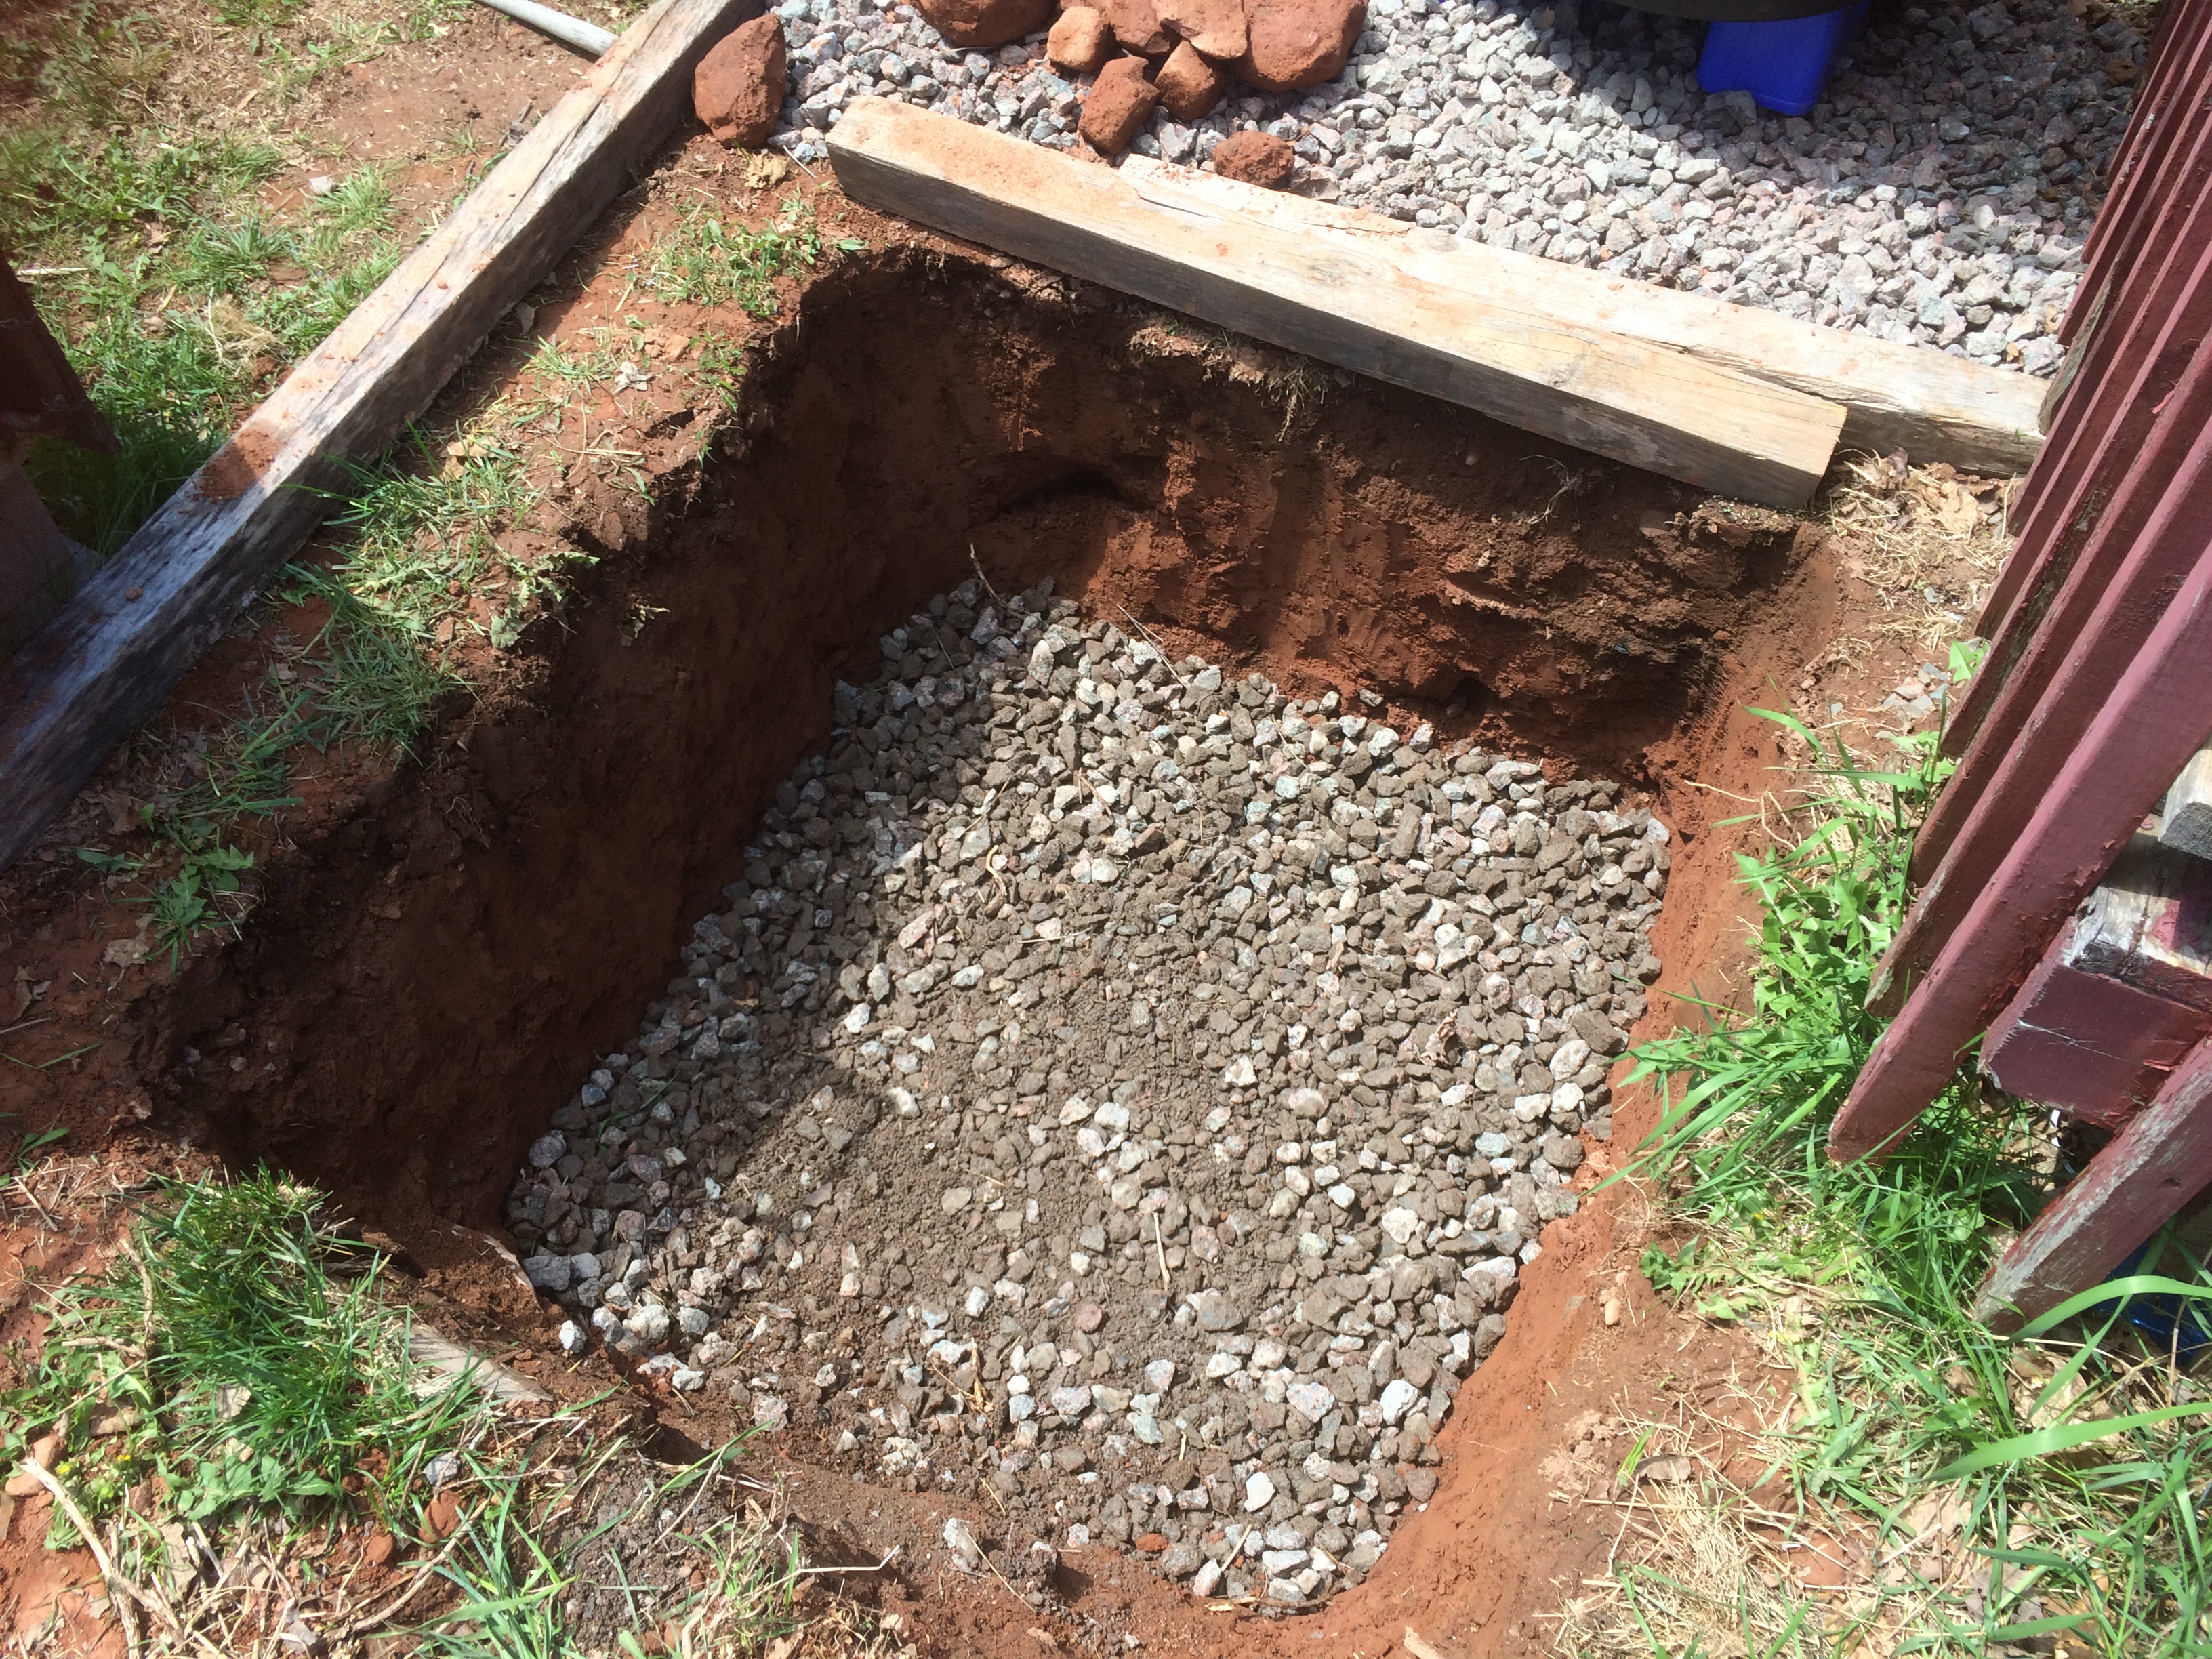
Job one, therefore, was taking the old system apart so that it could be partially redesigned. Specifically, the 390L “drift flow” solids settling tank (SST) was being removed and replaced with a pair of 200L “mushroom flow” SSTs. Those were going to then send their water to a 200L moving-media bio-reactor (MMBR). Finally, the moving-media bio-reactor would send it’s water to the sump tank, now dug 90% below grade.
The some of the plants would be held in “grow pipes”, the same as last year. However, instead of being flood-and-drain systems, the initial idea was to run them as constant-level services. Essentially, by the time I had subdivided my pump flow by five pipes plus the grow-bed last year, there wasn’t enough flow to reliably run the siphons. Everything grew just fine as constant height then, so I decided to reduce complexity.
Additionally, the last year’s panic-added media bed would be put back in place. This is where I wound up being forced to move the tomato bushes and cucumber vines half-way through the season last year. This year, the plan was things like beet greens.
However, as noted before, I need to go bigger. So, I’d be adding a pair of 200L barrels, each cut in half length-wise, to build a hybridized “Dutch Bucket” system to grow things like tomatoes in.
As I discovered last year, brassicas have nothing on tomatoes for root mass development in aquaponics. A 100mm grow-pipe is just not enough room for them. So, they need to be contained individually, which is why — I am guessing — most tomato growers use Dutch Buckets..
The last big addition to the system would be a 2.8m3 floating raft bed. The expectation was to grow around 120 “green leafy” plants here; primarily a mixture of lettuce, kale, and spinach. The idea was to run a “conveyor belt” to produce salad greens every week. Extra was just going to be fed to chickens to supplement their nutrition.
And then there’s what happened
The best laid plans of mice and men go about as well as expected with a rodent on the project management team.
Anonymous
Just about halfway through the teardown and rebuild, IE, the point of no return, I had a bit of a problem. I had a customer for my consulting business walk away from the table with a substantial amount of money left owing to me. I went from “doing okay” to “damage control” without warning.
On top of that, the local fish hatchery just isn’t answering phones or emails from the public this year. Which means that my source of trout for the system is a 300km round-trip away. My $50CAD of trout are going to have a $150 surcharge added to them, between gas and ferry.
Also, I forgot a “detail” when I decided to put the sump in a hole. That effectively increases my lift distance (head pressure) to get the same work done as last year. Unfortunately, last years pump was barely big enough to get the job done as it was for last year.
Naturally, however, I didn’t realize this until the sump was in the hole and full of water, and I tried to get water running through the same grow-pipes I used last year. So, I needed a new pump; that was another $50CAD.
So, the original plan had to be modified. For perspective, I’ve put about $300 in lumber, 200L barrels and PVC plumbing into this system this year to cover the expansion. For now, the hybrid Dutch Bucket system is going to have to wait, and so is finishing the floating raft bed. Depending on finances, I might have to settle for gold-fish / comet-carp in the system, with the idea of come fall they get fed to the chickens.
Another snag I ran into was the bottom drain. I went from a “solids lifting over-flow” pipe system after hearing a few YouTubers I follow talking about redesigning their own systems this way for better flow control and water level management. So, since I was rebuilding the system anyway, I figured I’d do the same.
After fighting with it for two weeks, I gave up. The problem I was having was that it never seemed to give me the ~2200L/h flow-rate I needed from the 25mm exit pipe. At one point, I realized that the two SSTs weren’t actually running water; all of the flow into the bio-reactor was from the over-flow surface skimmer on the fish tank. The two tanks were essentially stagnant.
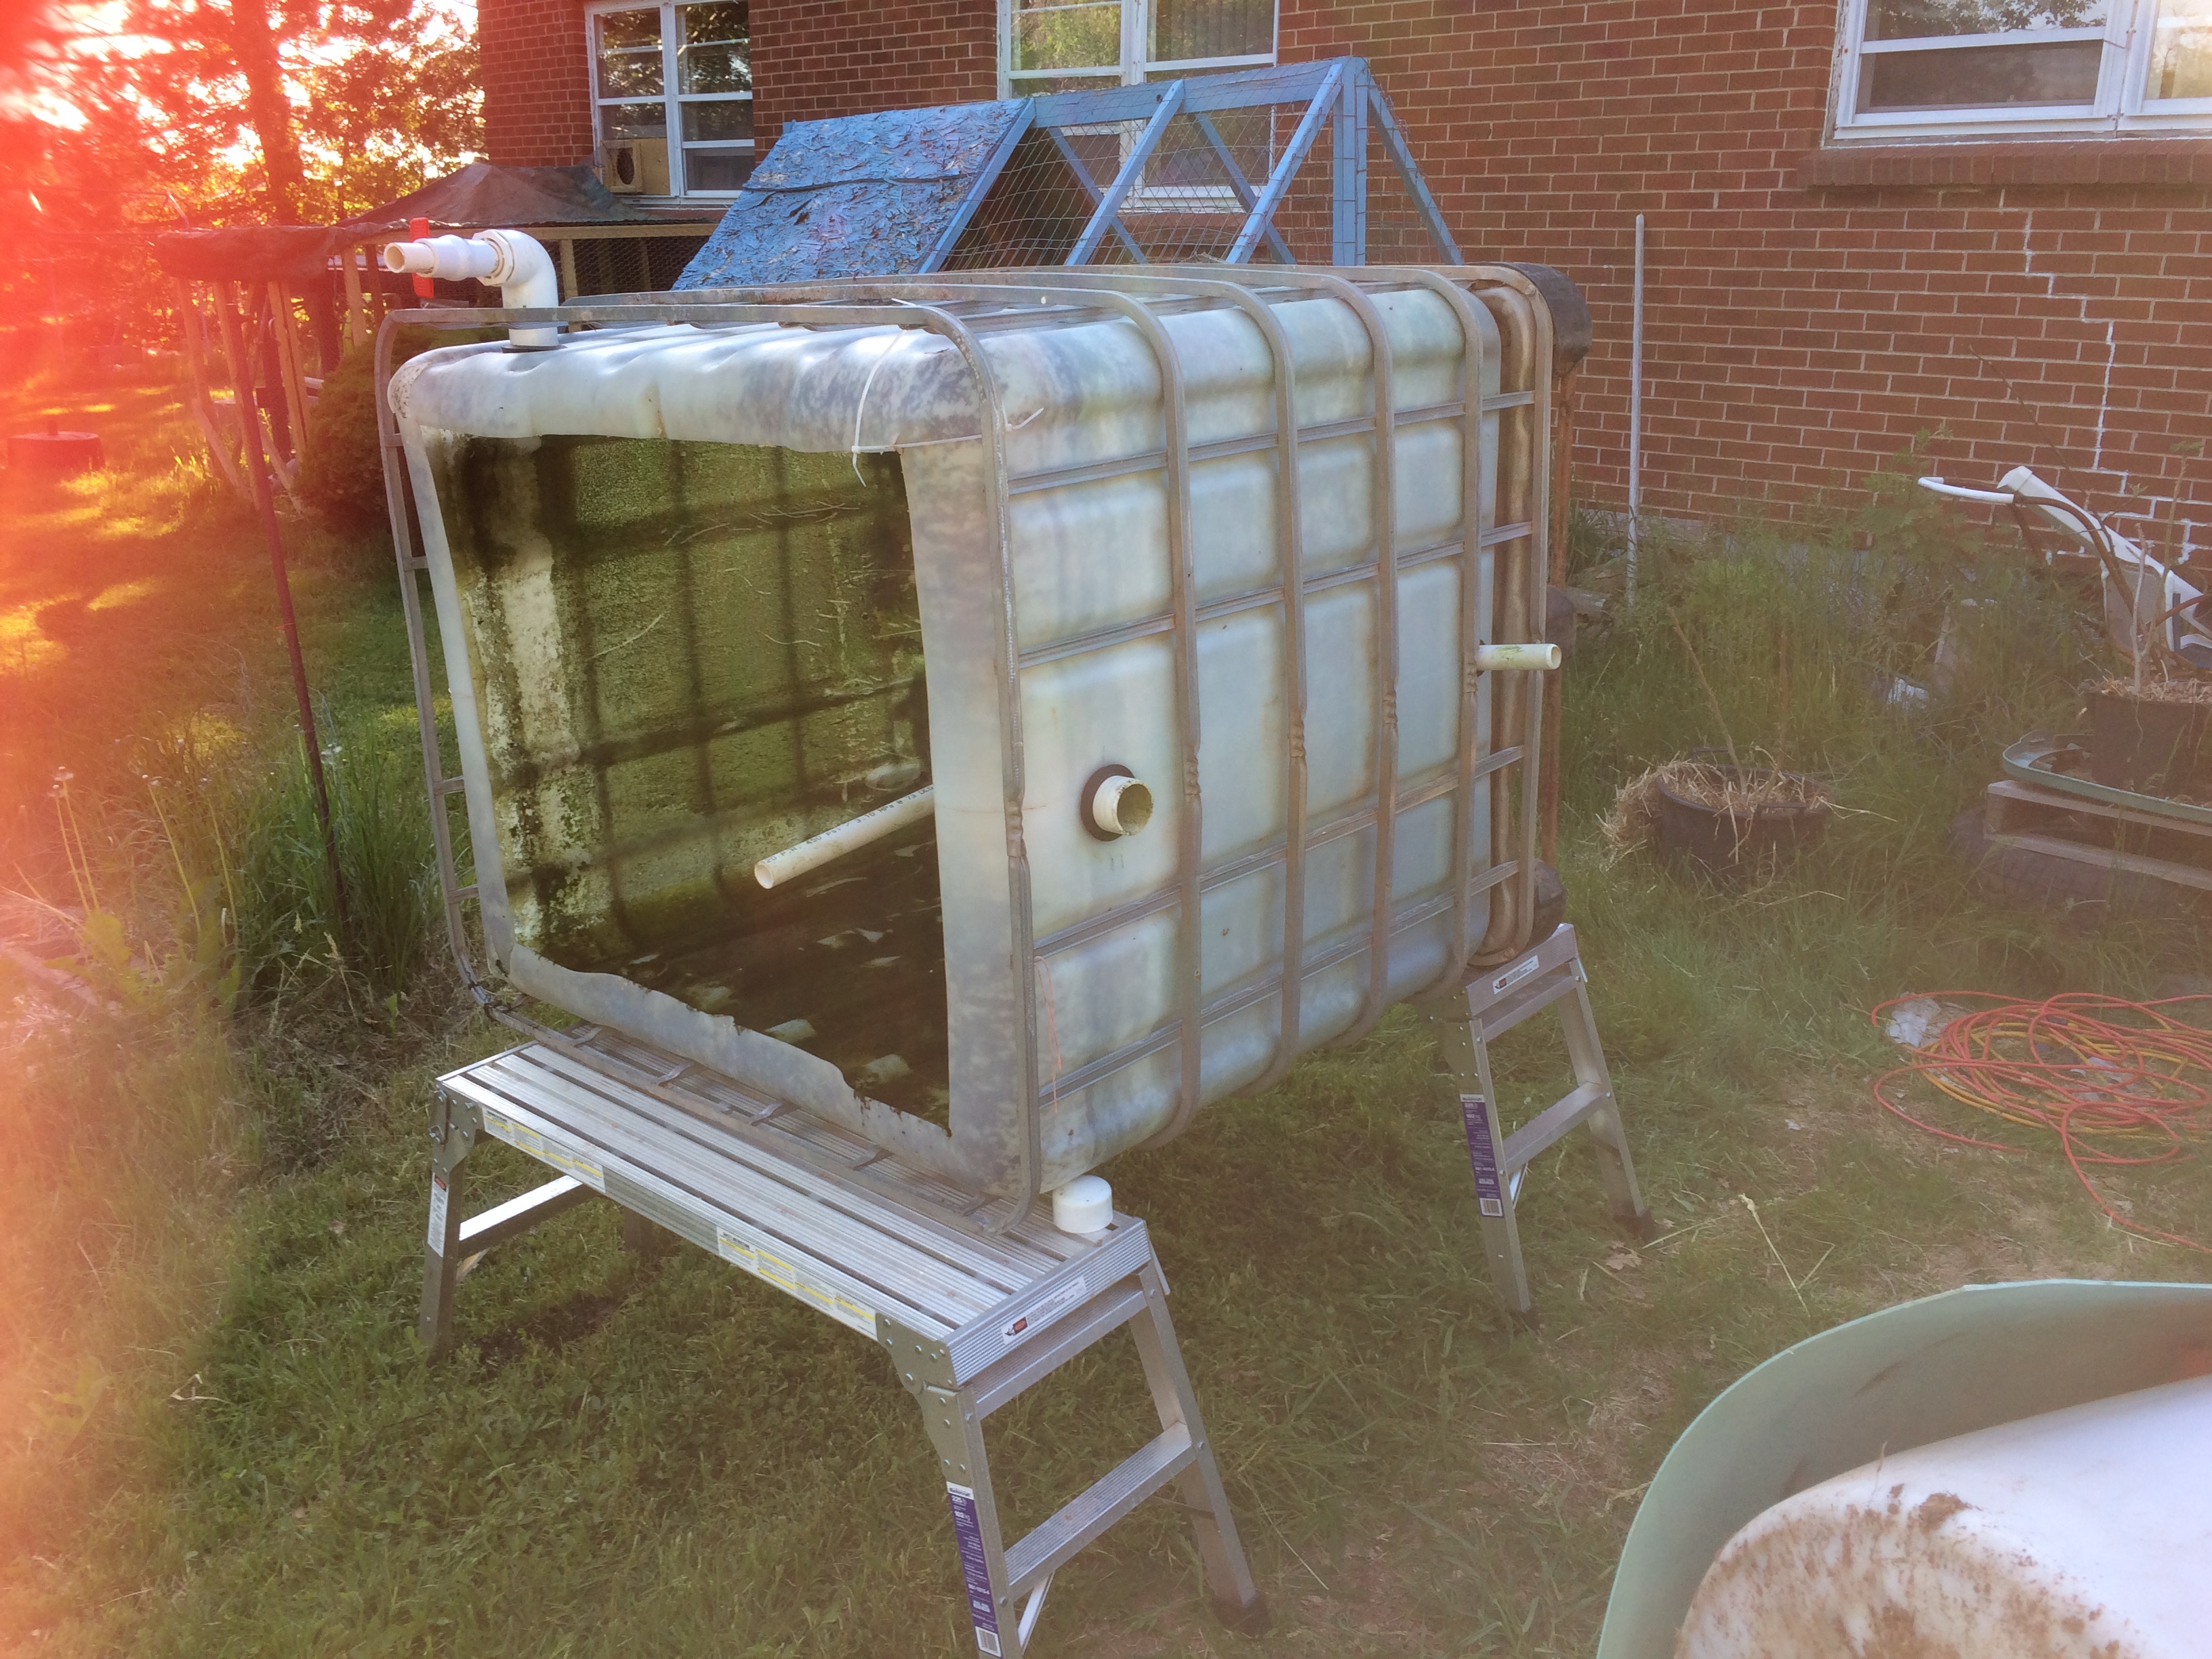
So, I had take the water out of the fish tank, pull the tank out and make some changes. While the drain is still at the bottom of the tank, what happens now is that instead of the elbow facing down to the bottom of the tank, it faces up.
The 25mm elbow is inside a 50mm tee-fitting, which is sitting on the bottom. Both the 25mm elbow and the 50mm tee-fitting have pipe which then runs upwards, towards the surface. The 25mm pipe stops about 30cm below water level. The 50mm pipe stops about 15cm above water level.
For water to get into the 25mm exit pipe, it has to flow around the tee-fitting and up, between the 25mm and 50mm pipes. It then “falls” into the 25mm pipe and flows out of the system. This seems to be working far better than the original bottom drain ever did. The bottom is staying clear of sediment, and the rate of flow from the fish tank into the SST’s is at least as good as I’d expected to see. That said, honestly I am not sure why it works now. It seems a bit counter-intuitive
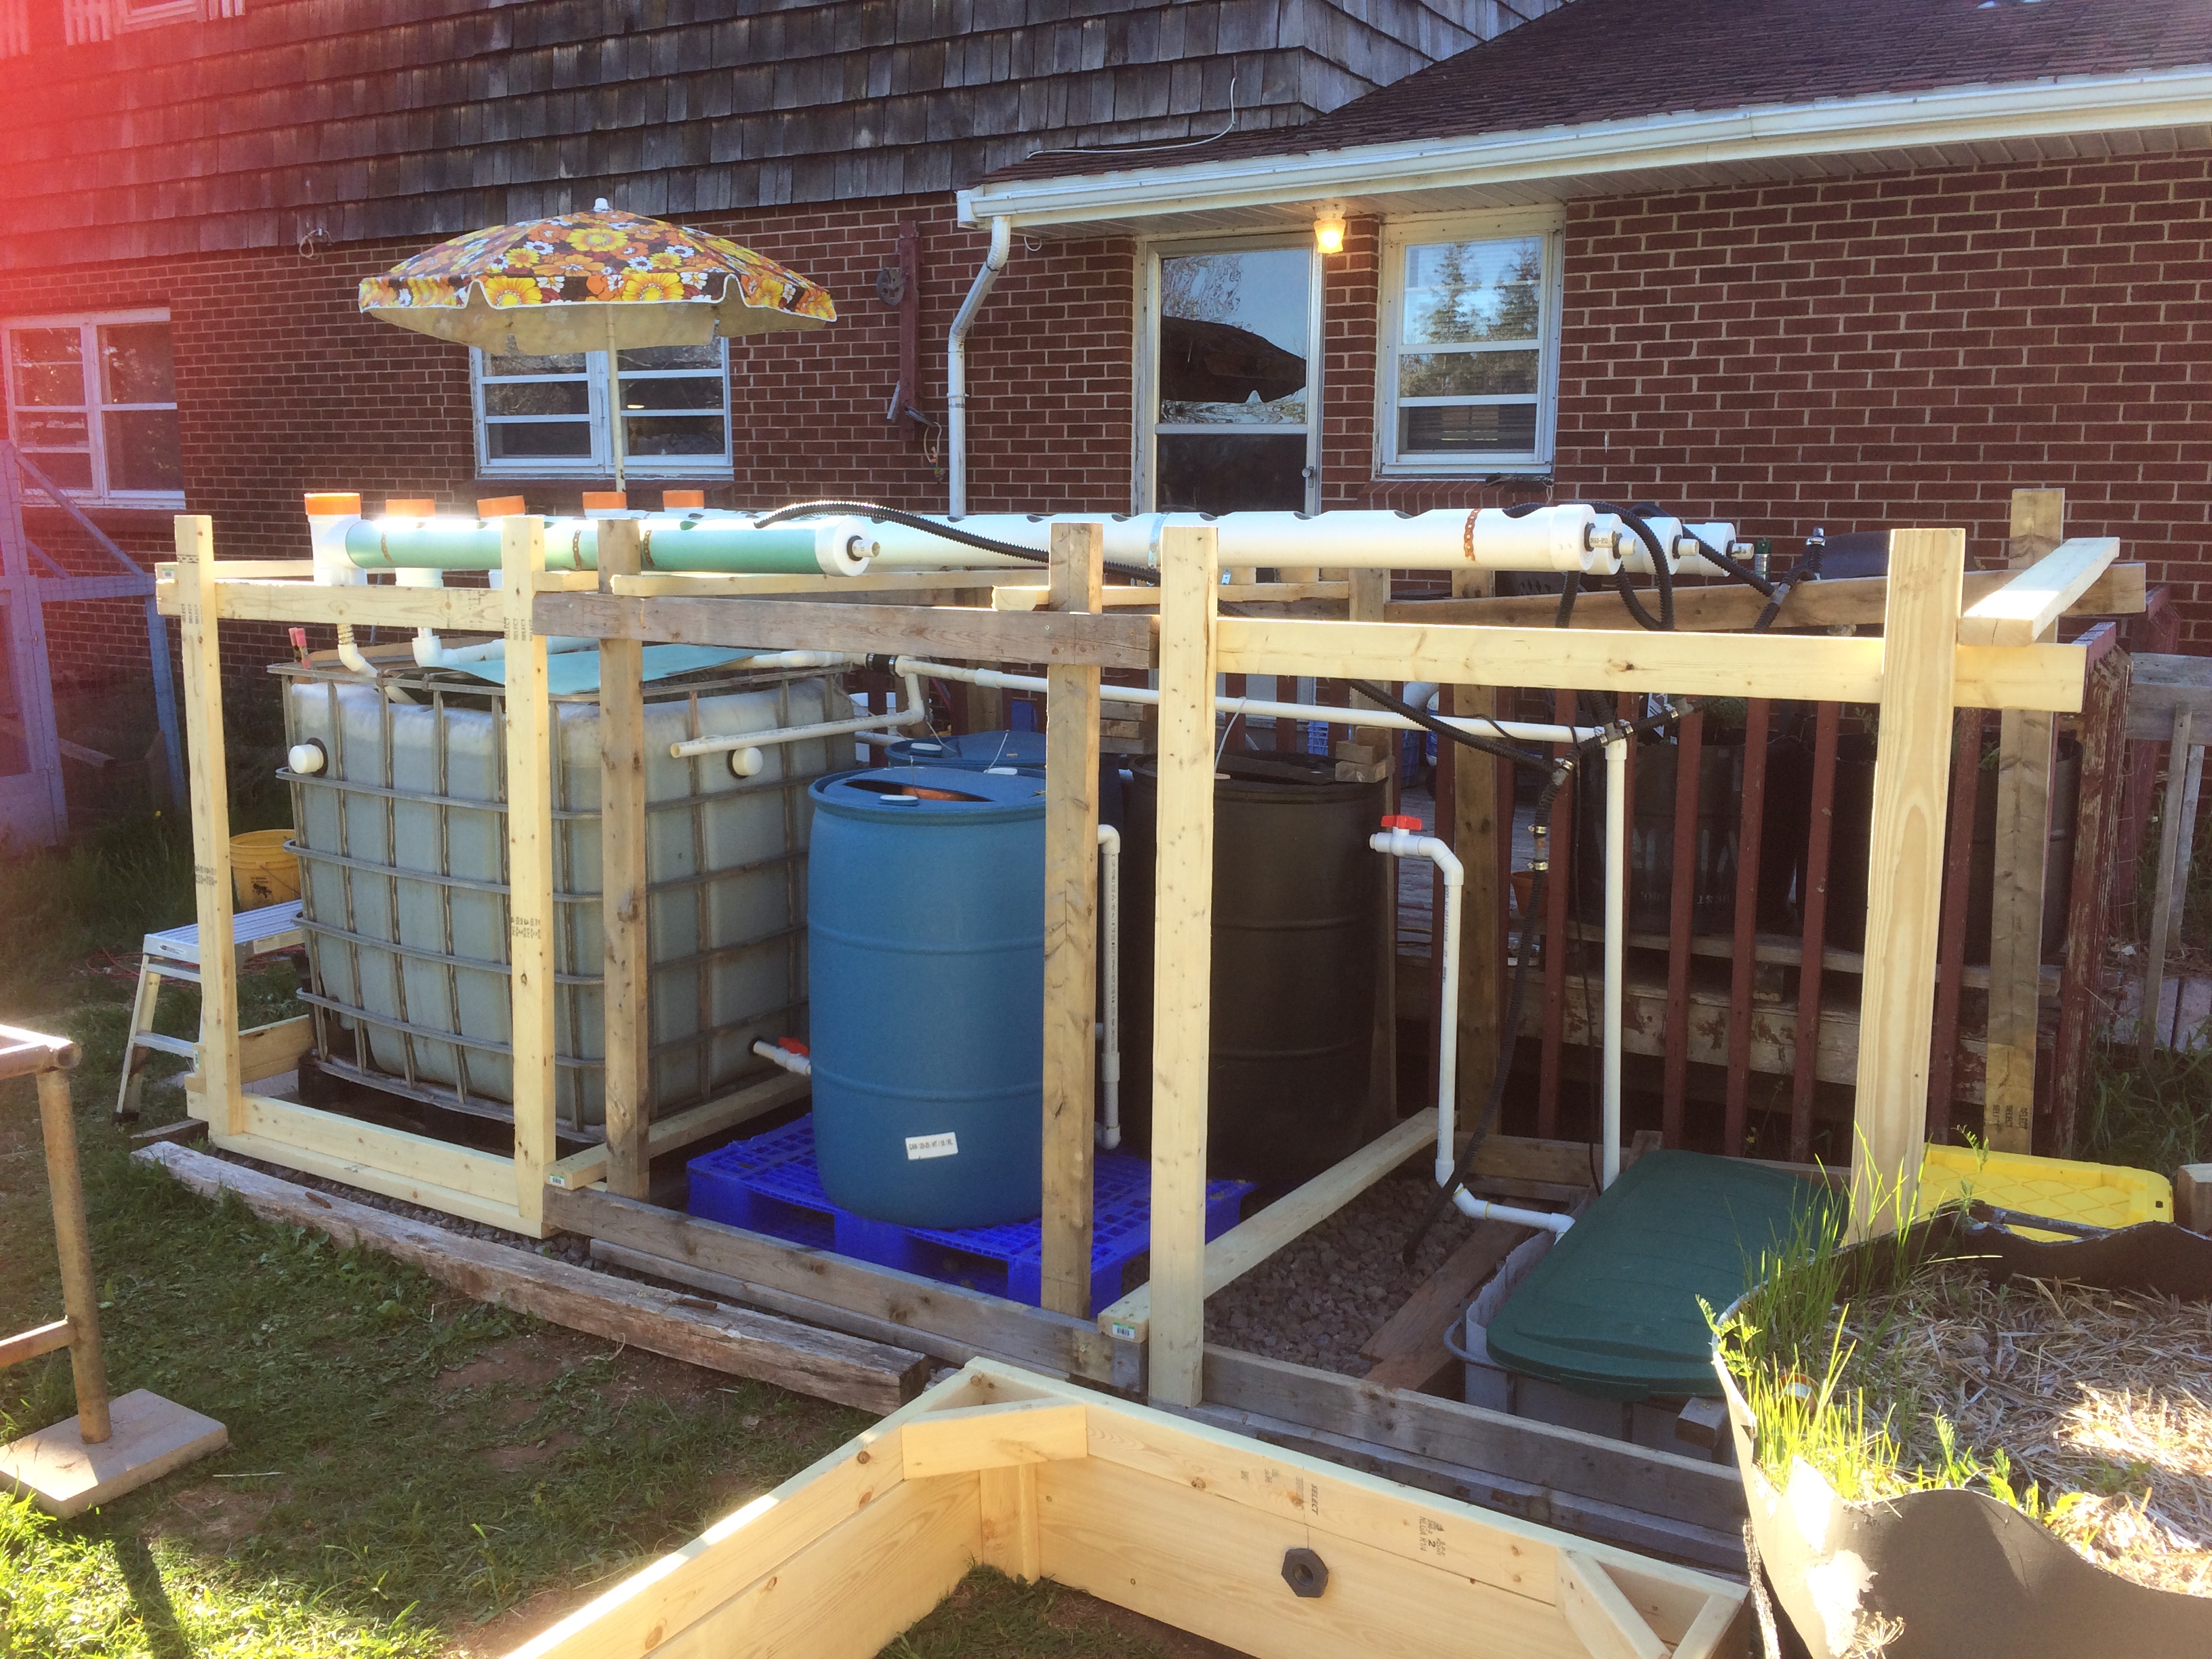
I’ve laid the plumbing out to “simulate” the flow path that the water to the media bed and floating rafts will take. In other words, it follows the route even though some of the stuff isn’t there. I did it that way to minimize the number of times I need to cut pipe and replace fittings.
So, the water comes up from the sump via 3200L/h pump, and hits a tee-fitting. Each side of the tee has a ball-valve to regulate rate of flow to it’s respective part of the loop. While the pump is rated for 3200L/h, there is about 2m of lift, so that cuts out about 60% of the flow. That remainder is then split at this tee-fitting.

One side heads to the grow-pipes and then beyond to pour into the fish tank. Essentially, if I have to pipe water to the other end of the system to refresh the fish tank, I might as well get some other “work” out of it. Additionally, the plants in the grow-pipes will hopefully use up some of the nitrates in the water heading to the fish.
The other side of the tee-fitting leads out to the media-bed loop. It goes along the length of the support frame, vertically up and over a trellis, and down into a stackable planter set. That planter set is sitting atop the media-bed, which will be filled in the future with a mix of gravel on the bottom half and hydration (expanded clay pellets) on the top half.
An adjustable loop siphon will keep the high-water mark about 25mm below the surface of the media, and will run the bed as a flood-and-drain. The water flows via straight pipe through the space that the pair of hybrid Dutch Bucket barrels will sit when they are installed in the future.
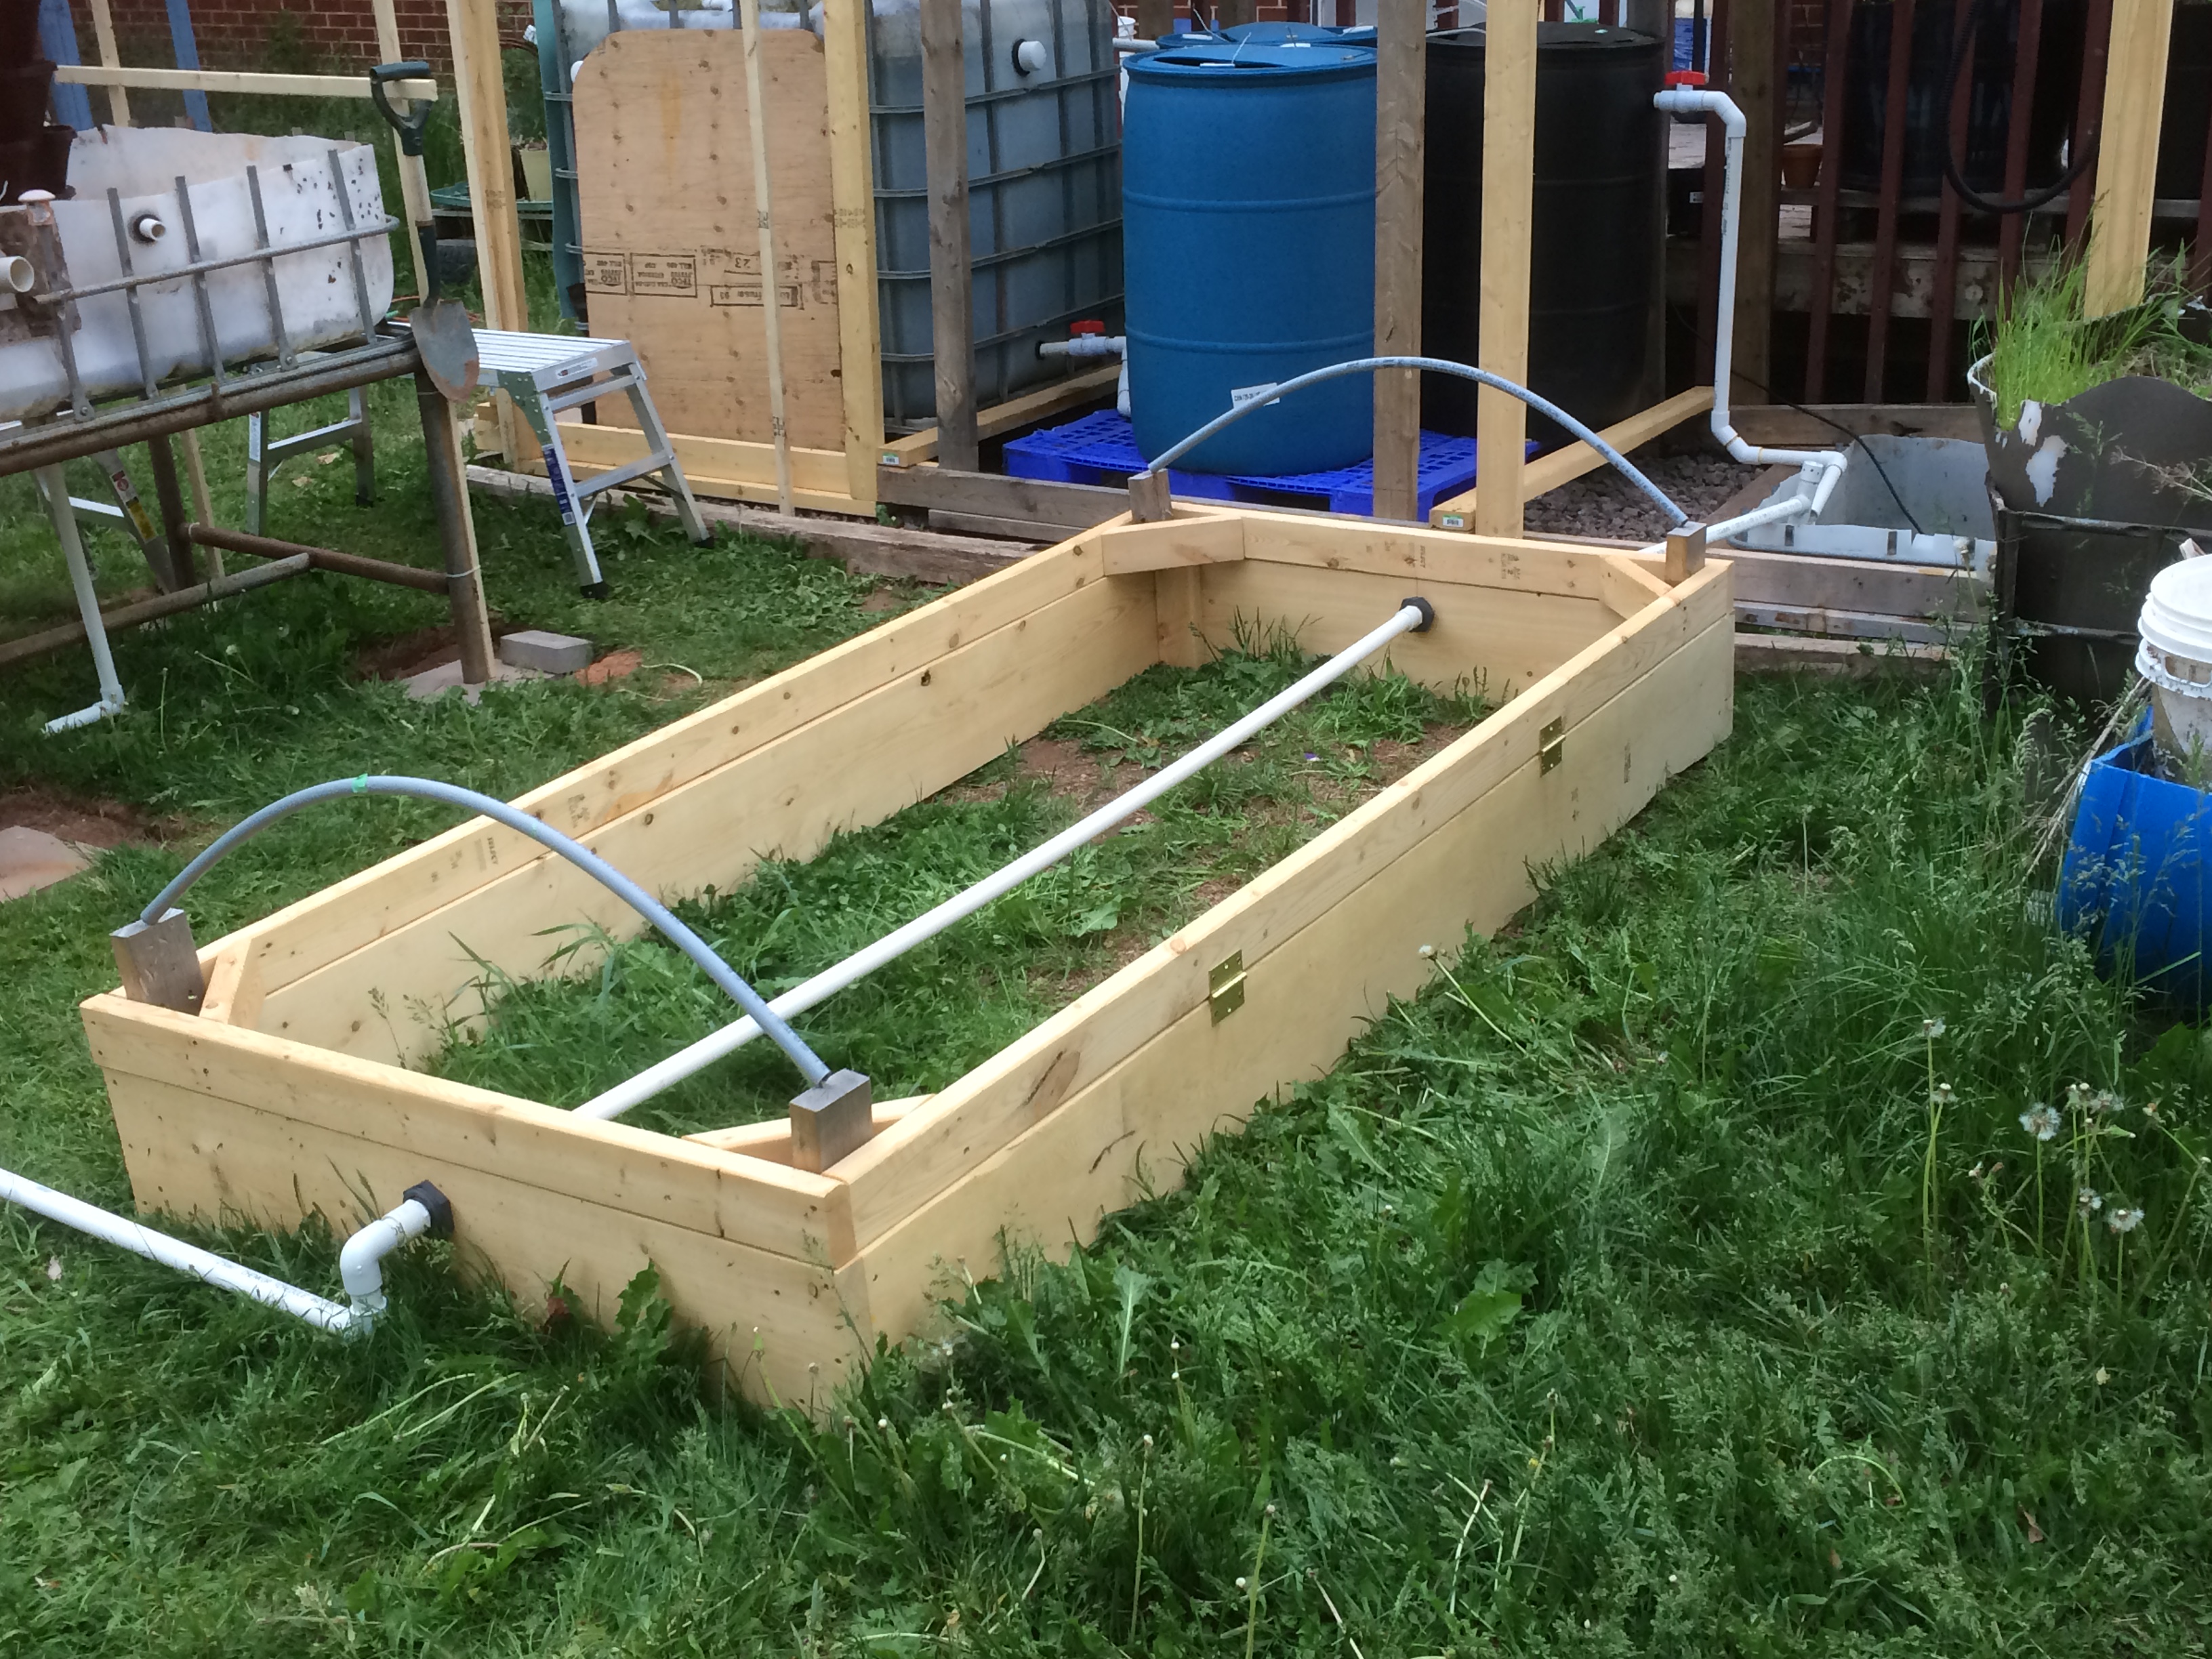
It then enters the frame where the raft bed is going to go, flows straight across via 25mm pipe, and then out the other side. From there, it returns to the sump.
As time and money permit, I can just close the flow value to this loop and add in the next component. That will let me recover the now surplus 25mm PVC for work in other places.
So far, so good
I did a water test last weekend, and the system is about 50% of the way through the cycling process; I “primed” the bacteria cycle with 80L of water from my basement aquaponics system and then added 600mL of fish emulsion as feed-stock. Two weeks later, and I was seeing nearly no ammonia, high levels of nitrites, and low levels of nitrates.
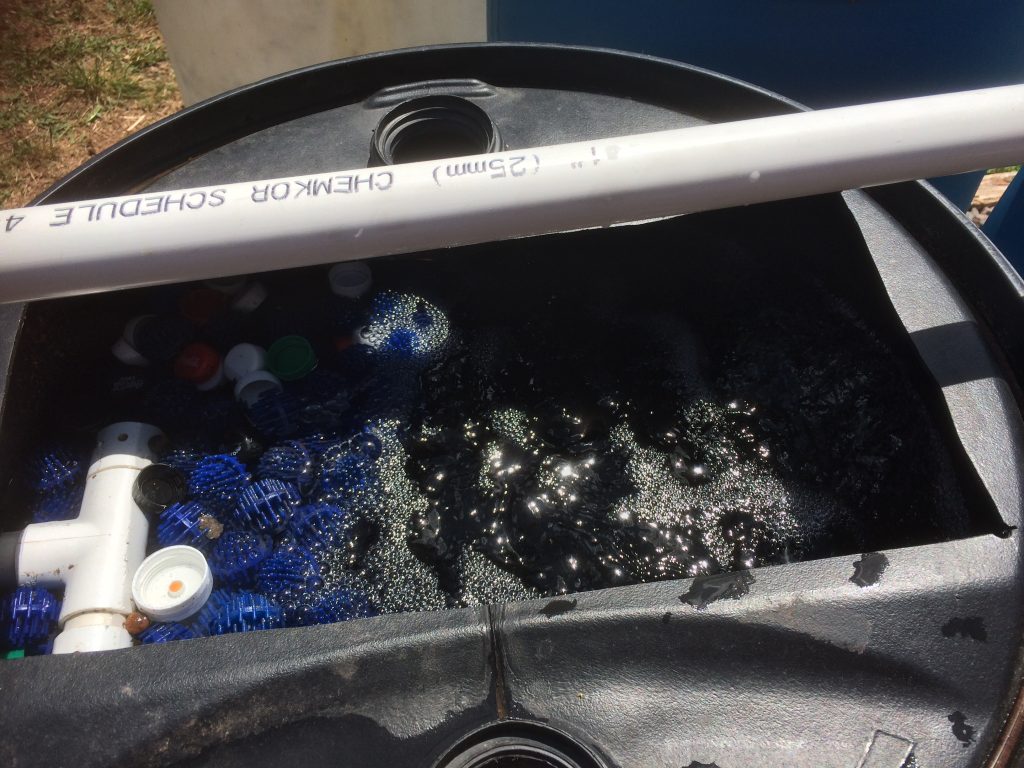
This means that the bio-reactor is doing what I want. It’s currently about 10% filled with a mixture of “Bio-Balls”, “K1” media, plastic soda-bottle caps and “K-Cups”. No, you read that right.
While both Bio-Balls and K1 media are more efficient in terms of surface area per volume, they are also expensive. Delivered, it’s almost $3CAD per litre of material. By comparison, plastic bottle caps and K-Cups are waste products we generated that cannot be recycled here.
With a 200L tank for the bio-reactor, it doesn’t matter how inefficient the free material is, given the cost. I can afford to pack the reactor full.
I’m directing between 20L/min and 30L/min of air into the bio-reactor, which is a median of 5.5L of oxygen per minute. In the 200L tank for the reactor, that is almost 3% O2 by volume. Water can only hold one-tenth of that before saturation, so the result is a pretty vigorous churn of material and water in the reactor.

Plants are in the grow-pipes and seem to be doing well. I’ve had a problem where the cucumbers are too heavy for their own stems in the net-pots, and have manage to all “pinch” themselves off. So I’ll have to replace those and plant them in “solo cups” in the grow-pipes to give enough media to support the young plants.
So now what?
Obviously, the sudden interruption of income is the major issue I’m dealing with as concerns the future development of the system. The good news is that I’m not yet in a critical rush to get the remaining elements plugged in and turned on.
The most important next step is getting media into the media bed. That won’t be difficult, since I’ve got what I used last year. It’s been stored away until I need it. There is a minor “duh-me” in that I need to actually install the loop-siphon to manage the water-level; I completely forgot to do that while getting the primary plumbing lines run out.
After that, it’s the fish. This weekend is approaching a monsoon in my local area with upwards of 120mm of rain coming down between Friday afternoon to Monday morning. I didn’t feel like driving through steep switch-back dirt-roads in rural Nova Scotia in that, so it’ll likely be next weekend that I get the trout.
The plan is to get 30 fish, each around 15cm in size. This is about the maximum stocking density for the tank I am using, which is an IBC filled to about the 950L mark. There will be an air-lift pump in the tank to prevent stratification and oxygen enrichment, plus there is the surface agitation from the water returning via the grow-pipes. Still, unless I want to go to bottled oxygen injection, 30 fish in that volume is about as aggressive as I want to get.
There are two reasons not to stock any more heavily. The first is that I want to ensure quality of life for the fish; more than 30 and really would need to put a second tank in. A second-hand IBC would set me back around $120CAD, which I’d like to avoid right now. More than 30 fish per IBC tank is getting over-crowded.
The second reason is that based on the chemistry from last year, I need 8 plants per fish to use up the generated nitrates. 30 fish is therefore 240 plants. That’s a lot of garden. A second tank with 30 more fish would mean nearly 500 plants; that is 2 more raft beds at nearly 3m3 each; that would add another $120 or more in costs.
About a month after the trout get here, I’ll have to get the raft bed operational to manage the water chemistry. Maturing fish make a lot of plant food.
The raft bed is going to be three layers of 6-mil plastic for the liner. That is just going to sit right on the ground, and be tacked to the frame with lathe-boards and roofing nails. The arches over the top, in the photo, are made of 12mm conduit pipe and fastened via screws to the raisable cover. A middle arch needs to be installed and then it will be covered with chicken wire. We have a chicken flock, as well as visits from critters like skunks and racoons, that I would rather not have pilfering the fresh greens.
The raft bed will have about 20cm of water in them. They will be bottom fed at one end, and surface drained at the other to keep the water-level even. I’ll be putting at least two, if not three, air-stones with 20L/min of flow in the bed to ensure that water moves and stays oxygenated enough to avoid things like root-rot. I may keep a goldfish or two in there as well, to prevent mosquito larvae or root over-growth.
That’s all for now
One of the big take-aways about this is that while aquaponics can be done DIY, it’s not free. It can easily get spendy at even small scales, and set-up takes a lot of time and energy.
On the other hand, the promise of a summer of nutrient-rich, full-flavour fresh veggies, a couple of substantial pots of pasta sauce in the fall and a few solid meals of high-quality fish are a strong incentive.
From a numbers perspective, I expect a return on investment of three years. That is to say, that in three years at common “grocery store” prices, the food I’ll harvest from this system will have paid for itself. Same cost, but better food.
I warned you it was going to be a long post. Thanks for sticking with me to the end.
I’m going to wrap this up here for now. I’ll likely make another post later on in the summer to update with progress. You can follow me via YouTube where I am posting video-blog updates every couple of weeks with greater detail, as well as doing Q&A as requested.
If you’ve got your own backyard aquaponics, I’d love to hear about it. Alternately, if you’ve got any questions, please let me know. Just post in the comments section below.
Thanks again for reading, and I hope you are having fun doing what ever it is you do.