Basement Aquaponics System Oct 8 Revsion
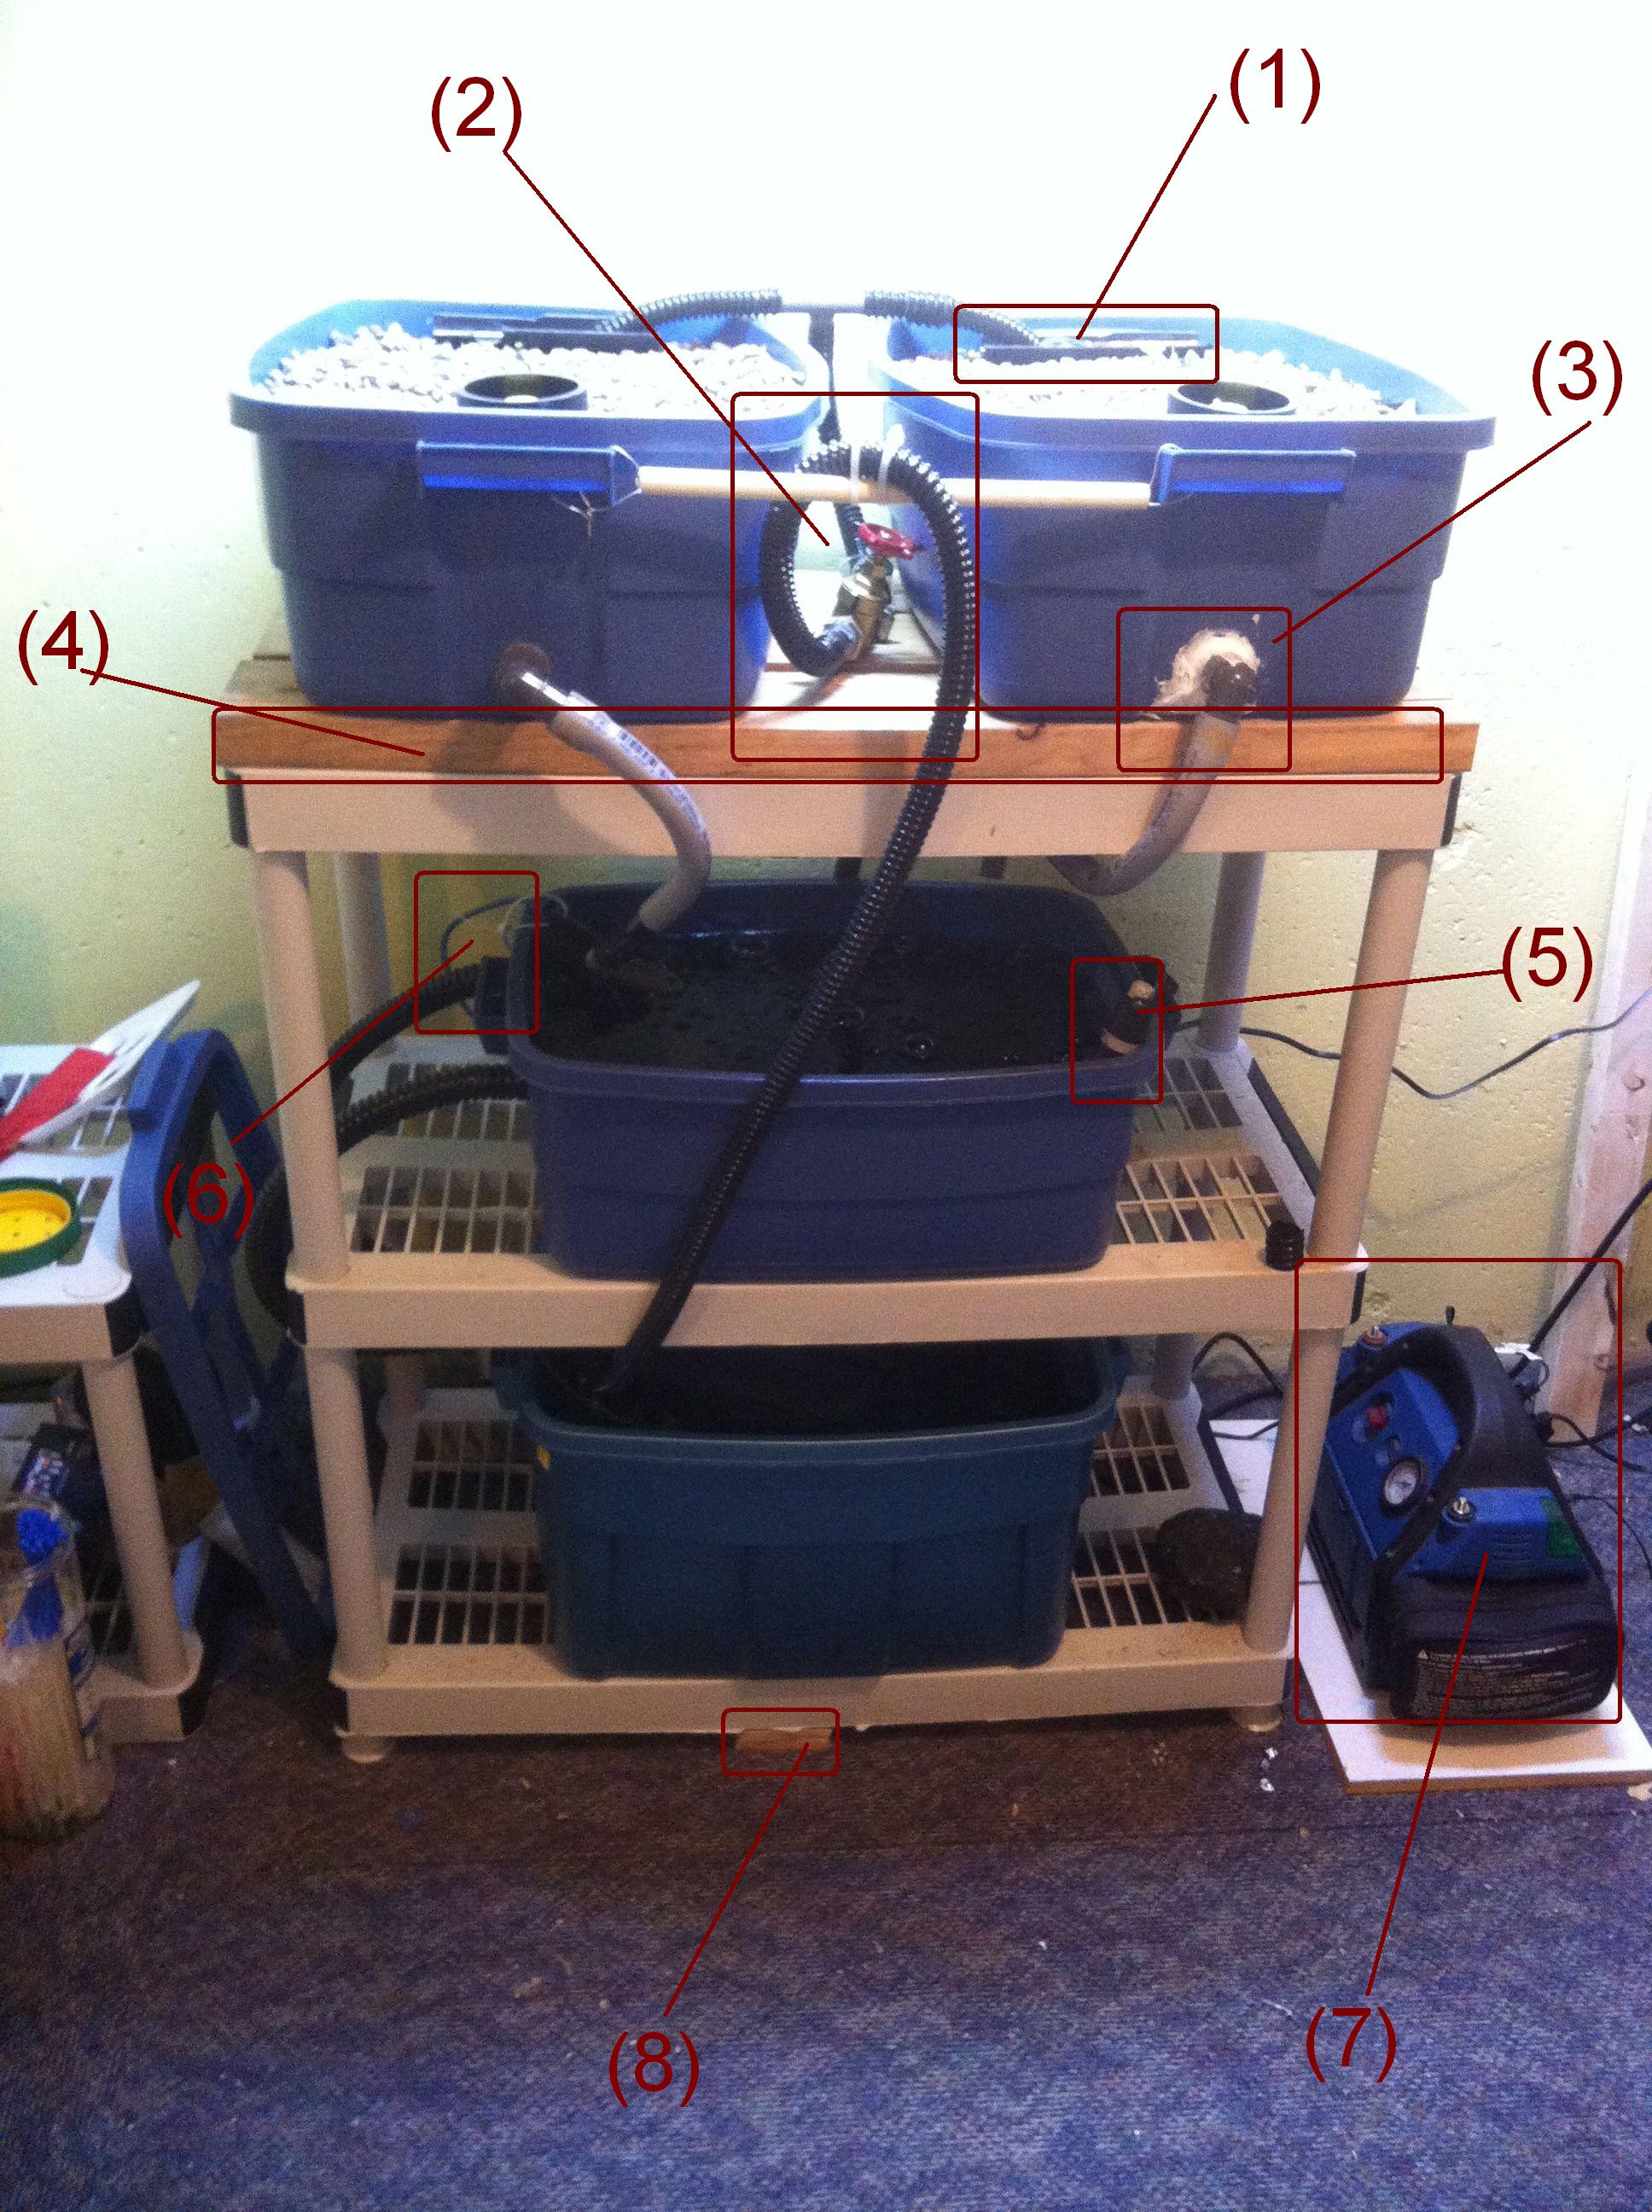
With that solution explained, I’d like to take a look at the system as it is currently running. First off, you’ll notice that the piping and hosing has been slightly readjusted for the way the system is laid out. Specifically there is now two small pieces of PVC pipe cut in half laying in the top of the gravel bed, noted by (1). Each of these pieces of pipe has several small holes in it, approximately 3/8″ diameter each.
Water is brought to the top by the pump, it is branched at the t-joint, flows into each gravel bed, and splashes onto these pieces of 1/2-pipe. The function of the 1/2-pipe is simply to ensure that the water is spread out more evenly across the back of the bed, so that is not just pouring in a column him straight down the back. This ensures that the water level rises more evenly and there aren’t any anaerobic “dead zones” within the grow bed.
Item number two is the flow control valve. Water comes up from the pump as noted before. It then reaches a T; on one side is the flow valve and on the other side goes up to the T split for the two grow beds. Water flowing through the flow control valve simply goes straight back down into the sump.
By opening or closing this gate value I can regulate the speed and flow of water into the grow bed. Also, the water which goes back down to the sump is sprayed onto the water’s surface. This means that the sump is constantly aerated and moving even if there is no water flowing from the grow beds into the fish tank and then overflowing back down the sump. Ensuring a high level of dissolved oxygen in the water through out the system is vital both for the fish and the plants.
Item number three is another problem we had. With all the tinkering and testing we did prior to this point, trying to get the standpipe to be perpendicular to the water surface, I unfortunately damaged the plastic of the Rough Tote tub. It began a slow but steady leak. Trying to fix it simply by tightening the bulkhead did not work. So I resorted to applying silicone caulking that is both aquarium-grade and fish-safe. This is completely sealed the leak; unfortunately it also meant that the piece of pipework is now permanently sealed into the tote.
Item four is a set of 2″ x 6″ planks which are used to strengthen and reinforce the top shelf. The problem with the shelving unit is that while it said it was rated for 150 pounds per shelf, the fine print said “evenly distributed”. In practice this means that the total surface area must be consumed to use the hundred and fifty pounds per shelf. The two totes full of water and media are approximately 160 pounds, which should not have been too bad. Unfortunately because all the weight was essentially in the middle of the shelf, it was deforming.
The 2 x 6 planks essentially function as a single solid surface, allowing the total weight of the two totes to be distributed over almost every square inch of the shelf. This has completely corrected the problem.
Item number five is a water heater. This is a standard submersible aquarium heater. Tilapia like to have the water temperature around 24 to 25°C. This gives the best possible temperature range for their growth. The small unit has, over about the span of 24 hours, brought the temperature of the water and media into this range.
The next addition was item number six. Since, as noted before, dissolved oxygen levels are absolutely crucial we added a small air pump as well as a series of airstones totaling about 45 cm or 18 inches in length across the bottom of the fish tote.
This is connected to item number seven, which is a battery pack. We normally keep this for camping and for use in our truck during emergencies on long winter drives, however most the time it’s just sitting on the shelf.
The battery pack on a test was good for about five hours of running the air pump. Since most power failures in our area are at most only three or four hours long, this should ensure that the fish never wind up in a situation where the waters is not being aerated and turned, even if the grow bed pump is off.
A battery test with the pump reduced the available run time to less than an hour and a half. I have decided that the pump will remain off during a power failure since it is more crucial to ensure that there’s plenty of dissolved oxygen in the water for the fish.
Item number eight on the graphic is a bit of preventative medicine, as it were. I noticed that the bottom shelf was also starting to bow slightly and so installed a pair of wooden shims. They run the entire width of the shelf, from front to back, down the middle. The little bit of extra support seems to correct issue completely.