“No plan of battle survives contact with the enemy” — Murphy’s Laws of Combat
So, as I said in my previous post, I had a problem with the “Core” of my Rocket Mass Heater (RMH). This is the concept design I started with:
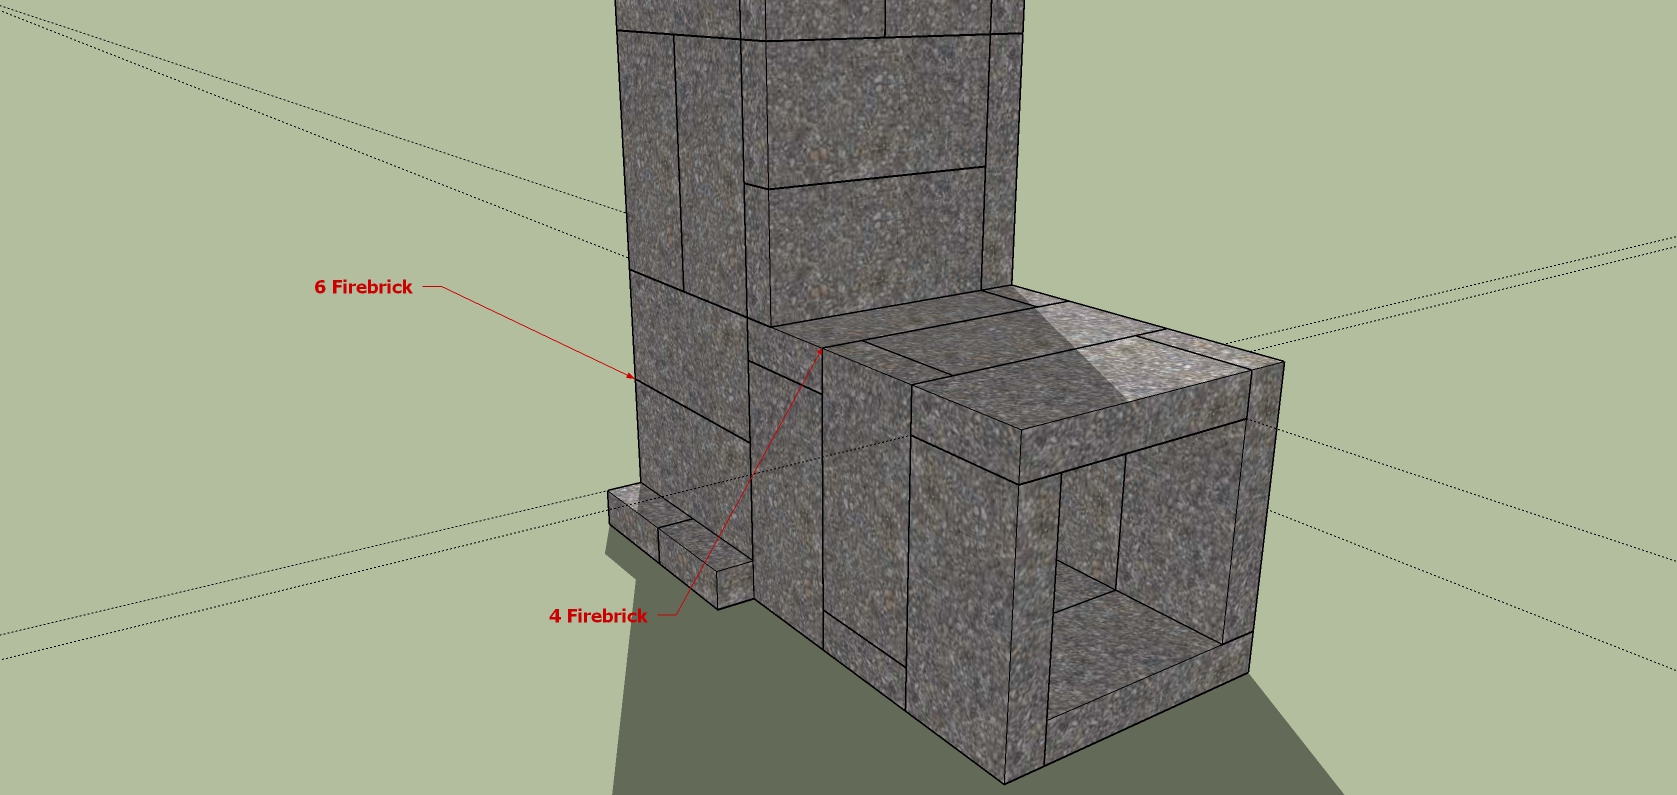
SketchUp view of the “core” of my Rocket Mass Heater
If you take a look at how the bricks for the Burn Tunnel are put together, you’ll see that they use a technique called a “boat builder’s corner”. The idea is that each piece is attached at the corner to simplify construction as well as “lock together” strength.
If you look carefully at the Burn Tunnel image, you’ll note that one cuff is “backwards” to the other. That’s intentional. It means that the seams don’t line up, so when the are stacked vertically, there is no way for an entire wall to fall apart. The staggered layering prevents that. At worst, you’ll have one board or brick fail.
Each square of four firebricks is assembled separately in a jig to ensure squareness and uniformity of size. I used a 1100C / 2000F temperature-rating furnace cement to connect them. I call the resulting box shape a “cuff”.
The cuffs are then put into place and cemented together to create the Burn Tunnel. This worked so well, in fact, that I used the same approach for the Heat Riser in the actual build.
So, is three (3) cuffs to build the Burn Tunnel, making the roof of the Burn Tunnel about 12″ / 30cm long. To the astute of you in the audience you may realize there is a problem here; for an 8″ / 20cm cross-section system, the Burn Tunnel should be four cuffs long for 16″ / 40cm. I figured that out after it was all put together. The shortness of tunnel is likely the primary reason this RMH is a “slow start”; it takes a bit over 20 minutes to come up to full temperature compared to the 10 – 15 minutes that is “normal”.
To add additional insulation to the roof of the Burn Tunnel I added two more bricks, each placed side-by-side on top of the Tunnel. They are turned 90-degrees to the to the other bricks, so that they spans two of the cuffs below them, and butts against the base of the heat riser. These extra bricks are bonded in place with the same high-temperature furnace cement I have used everywhere else.
I was mostly concerned with the thermal loss at the point where the first-stage combustion gasses were about to enter the Heat Riser and explode into the second-stage burn. So, I only placed the two bricks here. They’re $6 each where I am, so I’d already gone over $220 at this point, and I was thinking I was “saving” some money by not added at least one more to run the whole length of the roof of the Burn Tunnel.
I then put a thick layer of adobe clay over the Burn Tunnel as well as a couple of structural pieces to close up the Manifold area properly. This, of course, added weight to the roof of the Burn Tunnel.
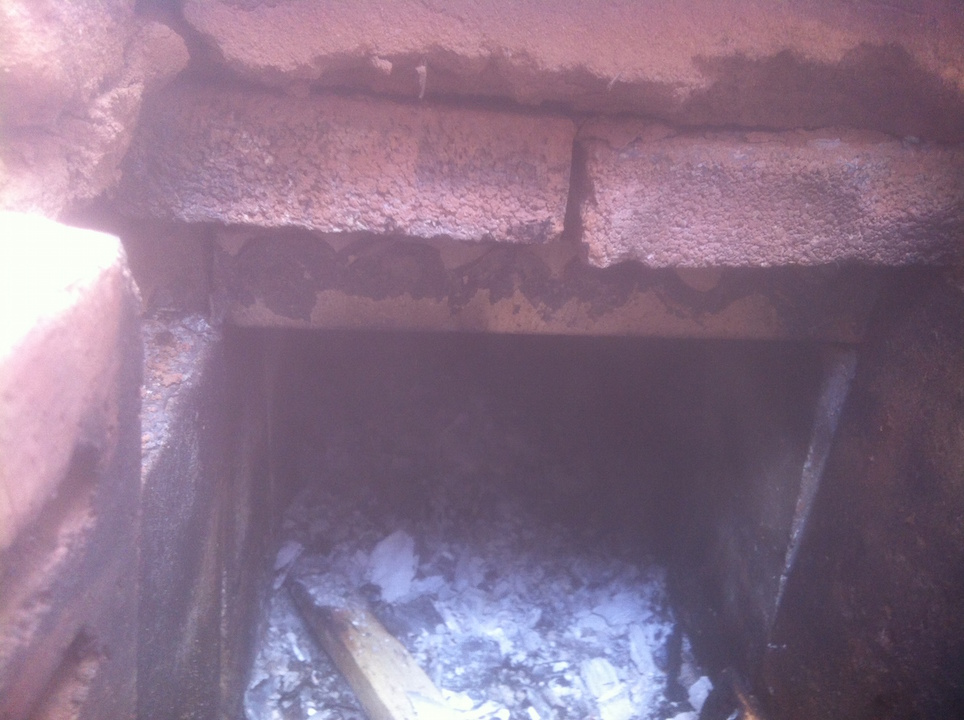
Mouth of the Burn Tunnel – You can see where one brick is missing
The join between the outer most “roof” brick in the Burn Tunnel and where it connects to the vertical brick on the right, failed. I suspect most of the problem was purely thermal shocks degrading the cement, and then the weight on top broke the join. Once that side was no longer supported, it eventually broke the cement on the other end of the brick.
Naturally, it failed when I was in the process of bringing the RMH up to temperature. This essentially cut the air coming into the Burn Tunnel in half resulting in a horrible amount of smoke-back.
As soon as I realized something was wrong, I simply pulled the bundle of sticks in the Feed Tube out and shoved them in a can of snow I keep handy for this sort of emergency.
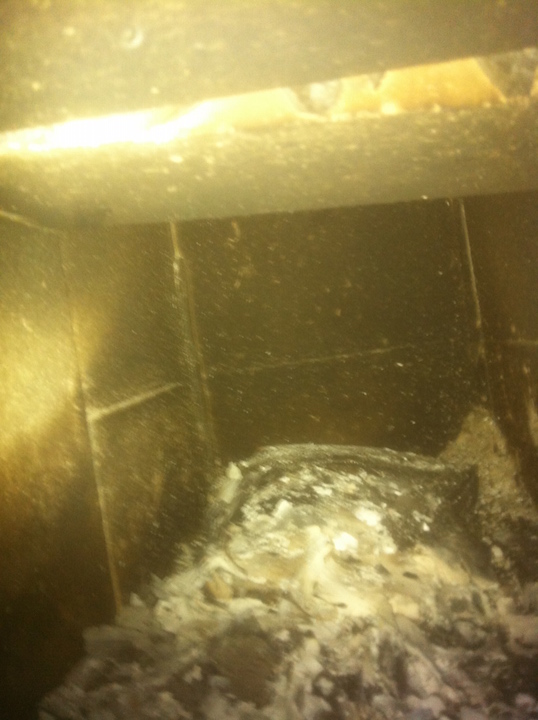
Union of Burn Tunnel and Heat Riser – The ash is left over starter material from the aborted heat-up cycle.
The next day I started the forensics and figured out what had happened. I put a camera and light most of the way down the Burn Tunnel to inspect for any other damage. There doesn’t seem to be any that I can see.
I was going to have to remove some of the adobe from around the top of the Burn Tunnel, just to fix the damaged cuff. When I started do that, however, I noticed that there were several hair-line to paper-thin cracks that had gone at least part of the way into the manifold area. A bit of carbon / smoke could be seen in these areas. Since I hadn’t noticed smoke coming out of these areas, it meant that fresh air had been getting pulled in. That possibly meant added combustion in places it should not have been.
So, from here, the next thing to do was inspect the Heat Riser itself for any evidence of damage from thermal shock or more cracking issues. To do that meant chipping back the adobe around the base of the Barrel Cover in addition to over the Burn Tunnel.

RMH with Barrel Cover Removed
All in all, it wasn’t as bad as I had been afraid of. It looks like there has been some shifting of the cement bricks that form the wall of the Manifold. They were just held together with wet clay, and not cement. That will need to be fixed.
As well,the top cuff is damaged. The thermal furnace cement is mostly gone. That would imply that the temperatures here, as I noted in my last blog post, crossed the 1100C / 2000F line for sustained periods of time. The bricks themselves are rated for about the same temperature range and yet show no damage, so I’m puzzled about that.
If it “ate the cement”, I’d expect to see some evidence of damage to the bricks as well. But they look pretty much new, beyond a lot of carbon black. In fact, now that I’m thinking about it, at those temperatures, a noticeable area of the Barrel Cover top would have been glowing red-orange. So I suspect that it’s not that the muzzle exhaust ever got that hot … I’m now thinking it was more likely to be a “poor” batch of furnace cement, or I didn’t use enough of it in a couple of places.
I’m going to be re-shaping and re-building the manifold area and liberally using cement to hold everything together there. I’m also going to add one more cuff to the Burn Tunnel, as well as adding more “spanning” bricks on the top of it to add insulation and structure. I’ll let you know how it goes.
As always, if you have comments, questions or suggestions, I’d love to hear from you. Please make use of the comments section; I’ll try to answer as quick as I can.